Creating a virtualized table from a single data source in Data Virtualization
Last updated: Mar 17, 2025
You can create a virtual table that uses any of the supported data sources.
About this task
Procedure
- On the service menu, click
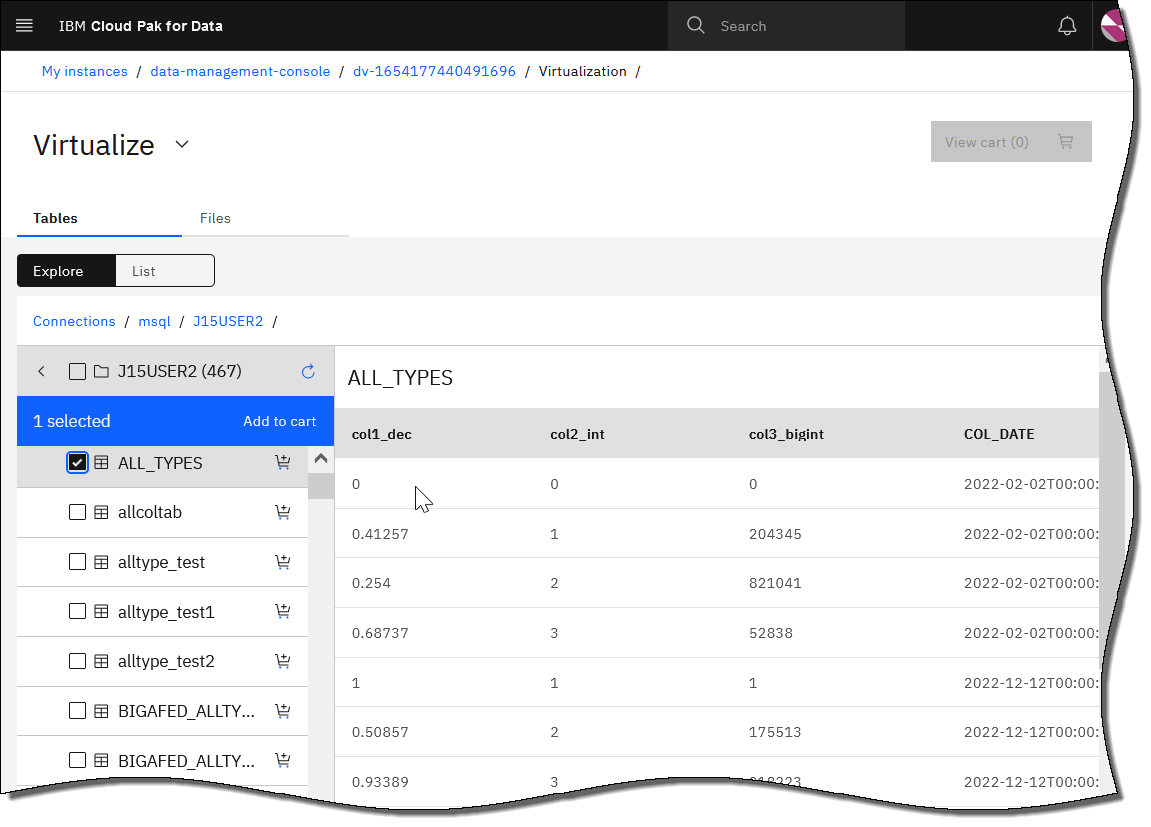
and click the Tables tab.
The list of connections appears in the default Explore view. Click a connection, schema, or table to select it and preview the contents.
The list of available tables in your connections appears in the List view. You can filter the listed tables by adding filters on the Data sources page. Additionally, you can search for tables by name, schema, column, or business term.
Note: When you add data source connections in Data Virtualization, you might need to refresh the Virtualize page twice. The first refresh notification is displayed when new data source connections are added. Click Refresh to reload tables, including new connections. After tables reload, a second notification is displayed. Click Refresh again to update your table list with newly loaded tables.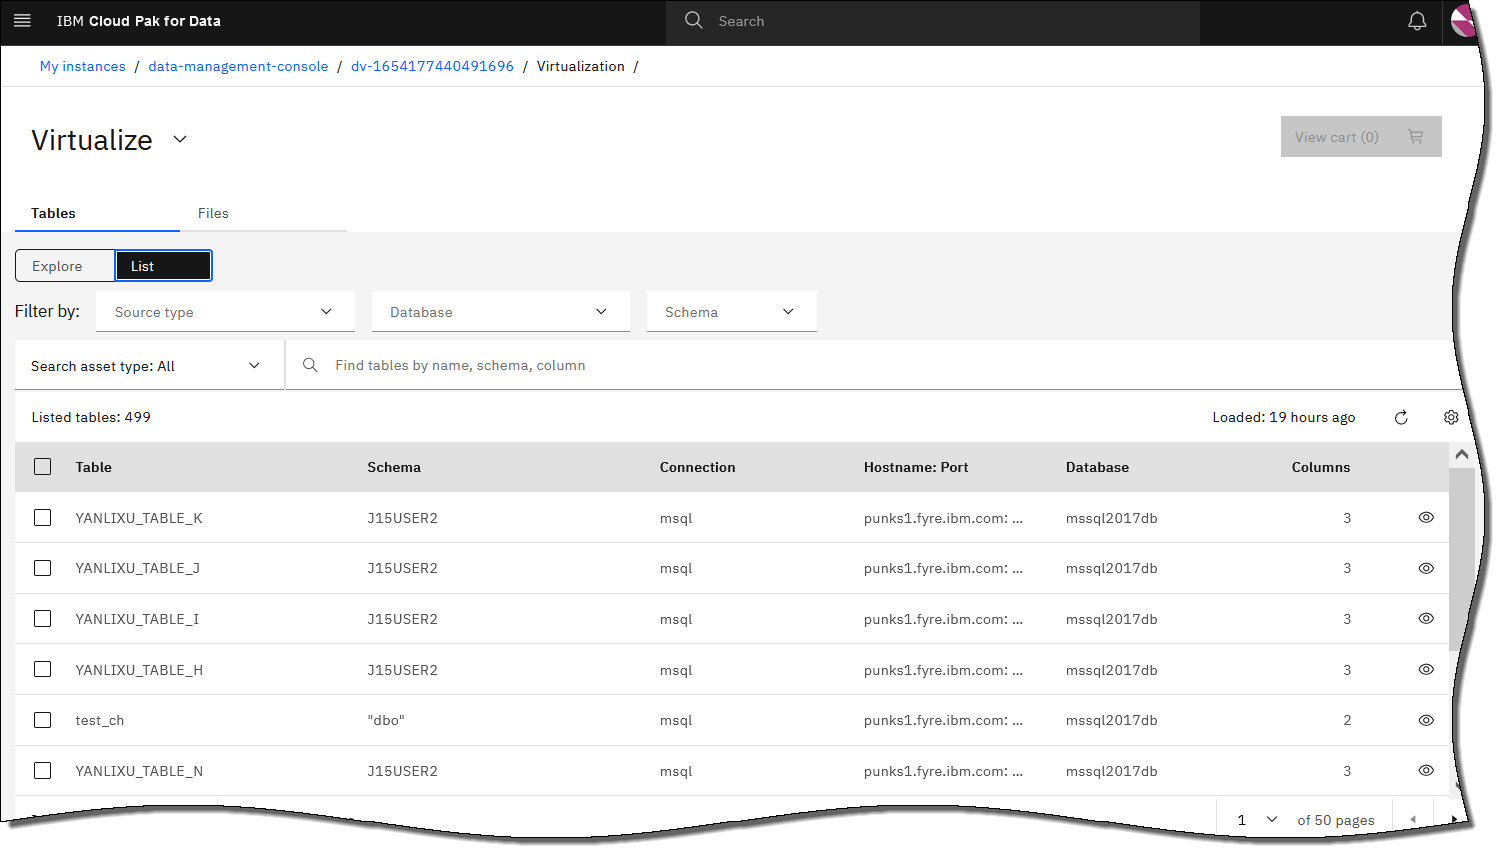
The list of available tables includes tables in which the read permission is not granted (nonreadable tables).
What to do next
- You can collect statistics for your virtual object. For more information, see Collecting statistics in Data Virtualization.
-
On the Virtualized data page, you can publish your virtual object to the catalog. For more information, see Publishing virtual data to the catalog in Data Virtualization.
- You can also create join multiple virtual tables to create a joined view. See Creating a join view from multiple tables.
Was the topic helpful?
0/1000