Setting up the platform on AWS
To set up the platform on AWS, you must create your IBM SaaS account, add users, set user roles, and create subscription instances. Then delegate access by establishing trust between your AWS account and IBM AWS account.
Prerequisites: To set up the platform on AWS, you must:
- Have an AWS account
- Have an IBM ID
- Have service subscriptions created on AWS. For details, contact the IBM sales team.
Follow this process to set up watsonx on AWS:
Creating user groups does not have any effect on watsonx. You can skip creating user groups.
- Create your IBM SaaS account or use an existing IBM SaaS account
- Verify the available subscriptions
- Add users to your account and assign roles to them
- Create subscription instances, as needed
- Delegate access by establishing trust between your AWS account and IBM AWS account
- Grant access through service IDs and API keys to enable access by applications and scripts.
Creating your IBM SaaS account
To create up your IBM SaaS account:
- Go to https://aws.console.saas.ibm.com and click Log in.
- Click Create account.
- In the window that opens, provide the account information. Then, from the Cloud provider drop-down menu, select AWS.
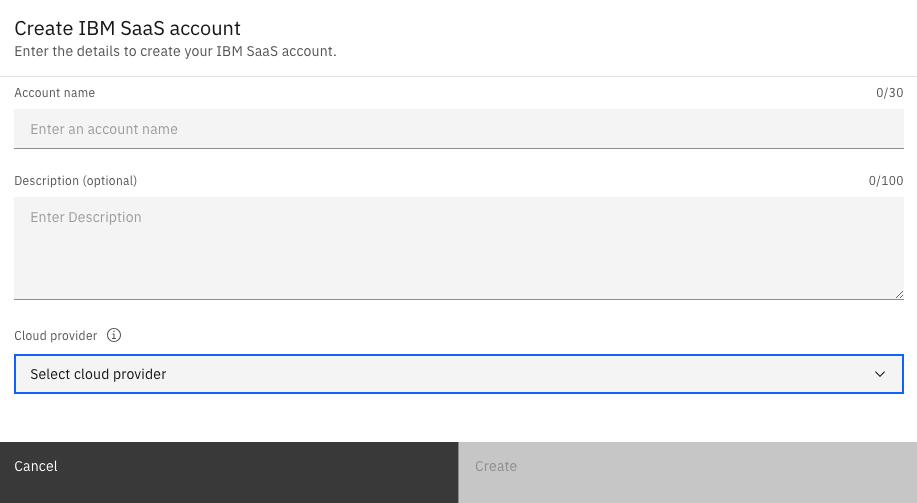
- Click Create.
- Your new account shows in the list of available accounts.
Delegating access by establishing trust between your AWS account and IBM AWS account
Establish trust between your AWS account and IBM AWS account. Define actions that IBM is allowed to perform in your AWS account. Follow these steps:
-
Go to
ap-south-1.aws.data.ibm.comand log in. -
From the menu next to your avatar, select watsonx.
-
From the navigation menu select Administration > Access (IAM) > Access Delegation.
-
Toggle Enable delegation to on.
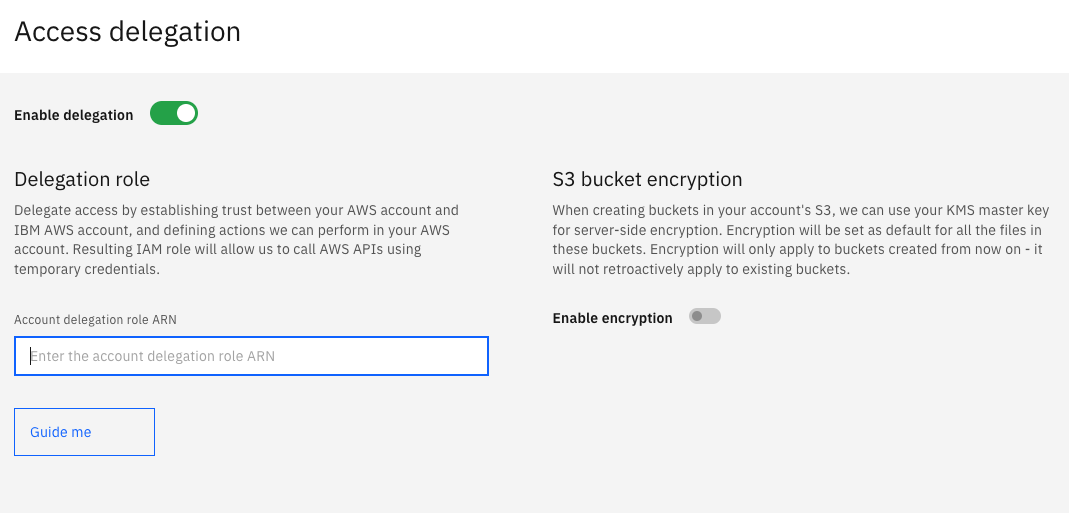
-
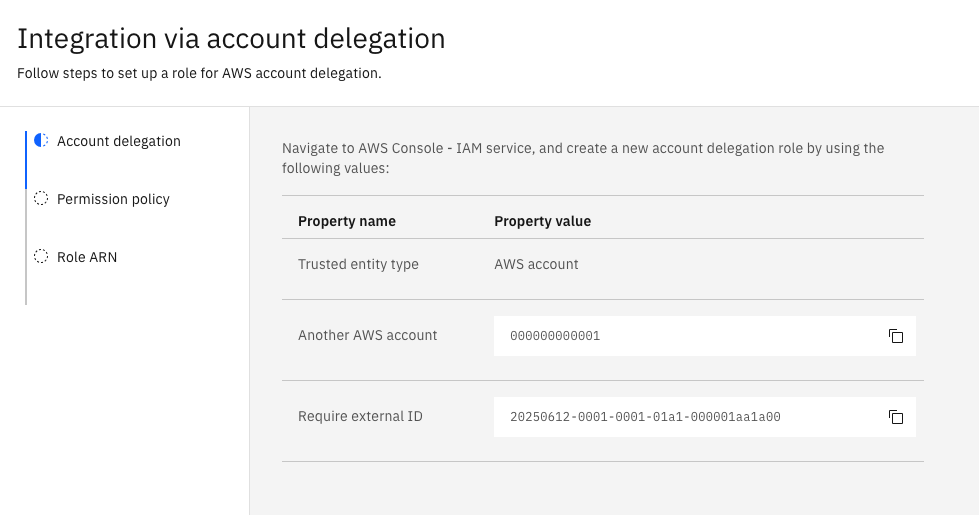
Click Guide me. Integration via account delegation pane appears. The Account delegation tab contains a list of property names and property values. You will need them to set up delegation.
-
Log in to the AWS Console and then navigate to IAM service. If possible, arrange your watsonx and AWS Console windows so that you are able to access both at the same time.
-
In AWS Console, create a new account delegation role by using the property names and values that you saw in the Account delegation tab of the Integration via account delegation pane of watsonx.
-
In watsonx, click Next. The Permission policy tab shows.
-
Copy the generated code that you see on the watsonx screen and then open the AWS Console again.
-
In AWS Console, in the location where you set up permissions for the account delegation role, create a permission policy and seed it by pasting the code from the watsonx Permission policy tab.
-
Save your changes and then copy the generated Amazon Resource Name (ARN). The created IAM role allows IBM to call AWS APIs by using temporary credentials.
-
In watsonx, click Next. The Role ARN tab opens.
-
Paste the ARN in the Enter the account delegation role ARN textbox and then click Test integration.
-
If test result is positive, click Finish. Trust between your AWS account and IBM AWS account is established.
Learn more
Parent topic: Administration