About cookies on this site Our websites require some cookies to function properly (required). In addition, other cookies may be used with your consent to analyze site usage, improve the user experience and for advertising. For more information, please review your options. By visiting our website, you agree to our processing of information as described in IBM’sprivacy statement. To provide a smooth navigation, your cookie preferences will be shared across the IBM web domains listed here.
AI governance tutorial: Build and deploy a model
Last updated: Feb 25, 2025
This tutorial is the first in a series of two tutorials. Take this tutorial to build, deploy, and track a model with the AI governance use case. Your goal is to train a model to predict which applicants qualify for mortgages and then deploy the model for evaluation. You must also set up tracking for the model to document the model history and generate an explanation for its performance.
Quick start: If you did not already create the sample project for this tutorial, access the AI governance sample project in the Resource hub.
The story for the tutorial is that Golden Bank wants to expand its business by offering low-rate mortgage renewals for online applications. Online applications expand the bank’s customer reach and reduce the bank’s application processing costs. As a data scientist at Golden Bank, you must create a mortgage approval model that avoids unanticipated risk and treats all applicants fairly. You will run a Jupyter Notebook to build a model and automatically capture metadata that tracks the model in an AI Factsheet.
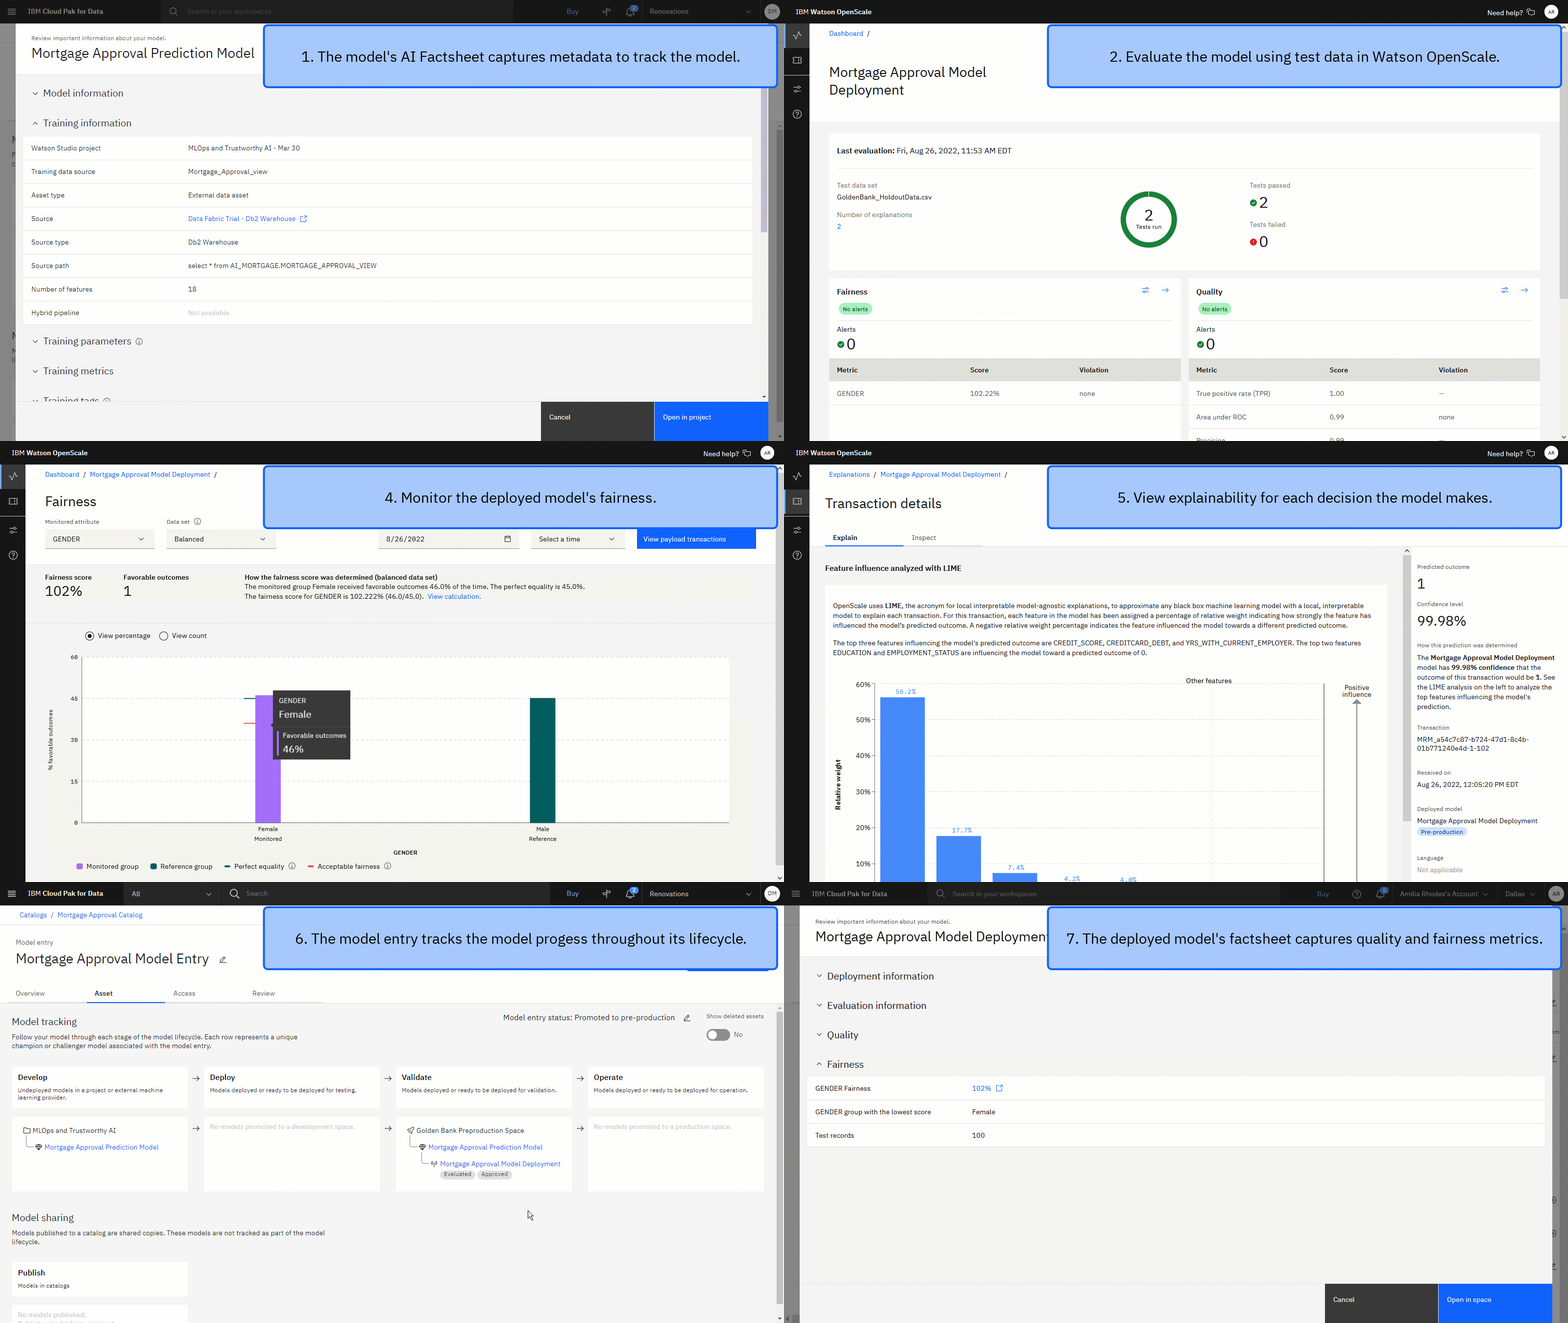
The following animated image provides a quick preview of what you’ll accomplish by the end of the second tutorial where you will use Watson OpenScale to configure and evaluate monitors for the deployed model to ensure that the model is accurate and treating all applicants fairly. Click the image to view a larger image.
Preview the tutorial
In this tutorial, you will complete these tasks:
- Set up the prerequisites.
- Task 1: Set up tracking for your model.
- Task 2: Create an AI use case.
- Task 3: Run the notebook to create the model.
- Task 4: View the model's factsheet and associate it with an AI use case.
- Task 5: Deploy the model.
 Watch this video to preview the steps in this tutorial.
This video provides a visual method to learn the concepts and tasks in this documentation.
Tips for completing this tutorial
Here are some tips for successfully completing this tutorial.
Use the video picture-in-picture
Tip: Start the video, then as you scroll through the tutorial, the video moves to picture-in-picture mode. Close the video table of contents for the best experience with picture-in-picture. You can use picture-in-picture
mode so you can follow the video as you complete the tasks in this tutorial. Click the timestamps for each task to follow along.
The following animated image shows how to use the video picture-in-picture and table of contents features:

Get help in the community
If you need help with this tutorial, you can ask a question or find an answer in the Cloud Pak for Data Community discussion forum.
Set up your browser windows
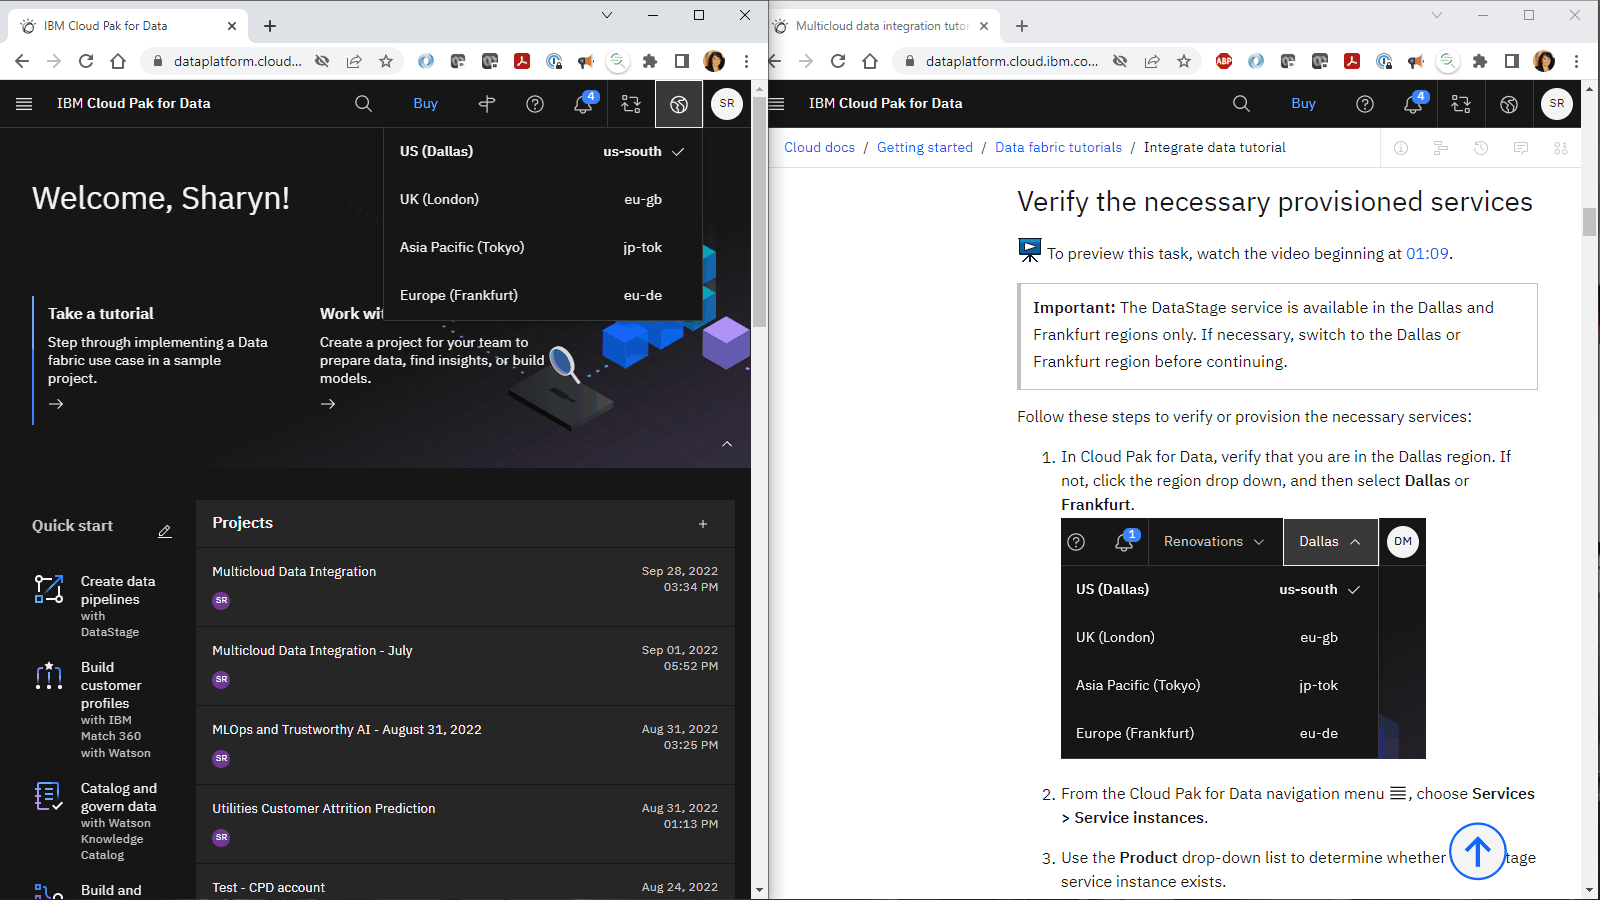
For the optimal experience completing this tutorial, open Cloud Pak for Data in one browser window, and keep this tutorial page open in another browser window to switch easily between the two applications. Consider arranging the two browser windows side-by-side to make it easier to follow along.
Tip: If you encounter a guided tour while completing this tutorial in the user interface, click Maybe later.
Set up the prerequisites
Sign up for Cloud Pak for Data as a Service
You must sign up for Cloud Pak for Data as a Service and provision the necessary services for the Data integration use case.
- If you have an existing Cloud Pak for Data as a Service account, then you can get started with this tutorial. If you have a Lite plan account, only one user per account can run this tutorial.
- If you don't have a Cloud Pak for Data as a Service account yet, then sign up for the trial.
Verify the necessary provisioned services
 To preview this task, watch the video beginning at 01:06.
Important: Model inventories and AI use cases are available in the Dallas region only. If necessary, switch to the Dallas region before continuing.
Follow these steps to verify or provision the necessary services:
-
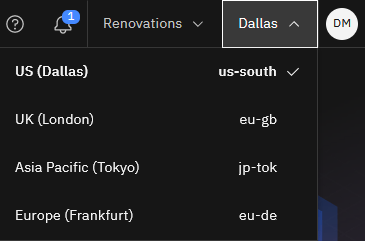
In Cloud Pak for Data, verify that you are in the Dallas region. If not, click the region drop down, and then select Dallas.
-
From the Navigation menu
, choose Services > Service instances.
-
Use the Product drop-down list to determine whether there is an existing watsonx.ai Studio service instance.
-
If you need to create a watsonx.ai Studio service instance, click Add service.
-
Select watsonx.ai Studio.
-
For the region, select Dallas.
-
Select the Lite plan.
-
Click Create.
-
-
Repeat these steps to verify or provision the following additional services:
- watsonx.ai Runtime
- IBM Knowledge Catalog
- Cloud Object Storage
You need administrator or manager access for these services. For more information, see Managing users and access.
 Check your progress
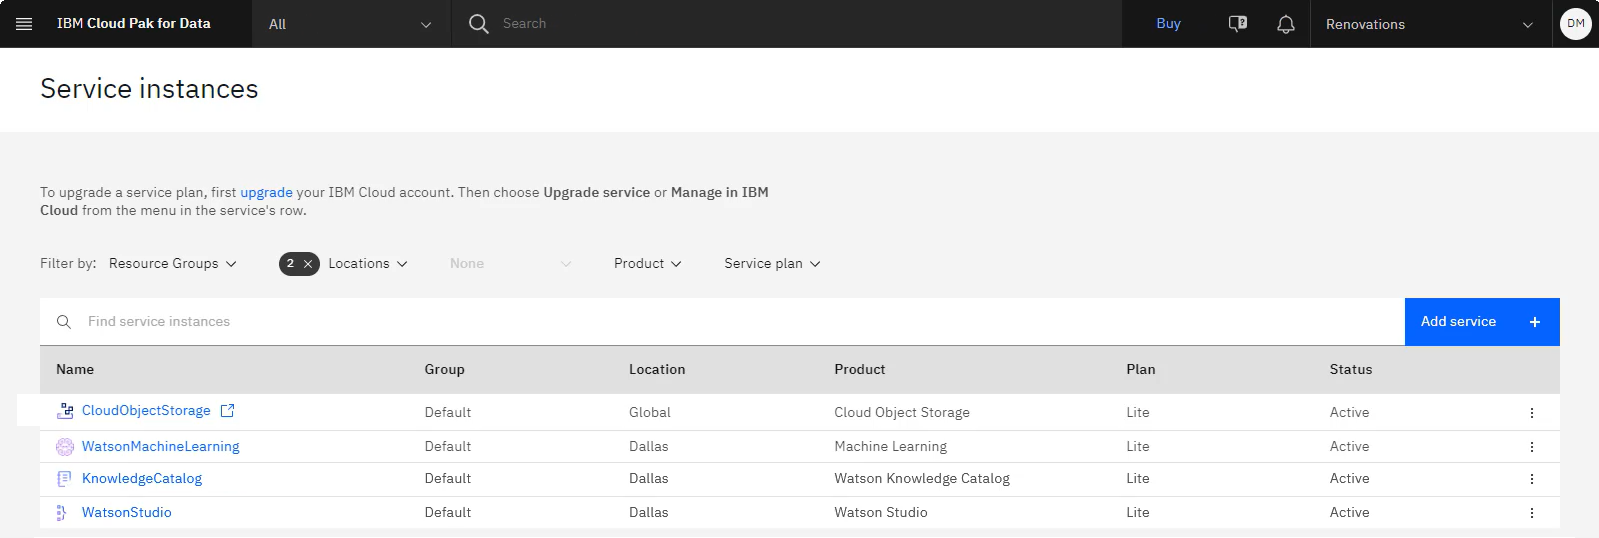
The following image shows the provisioned service instances:
Create the sample project
 To preview this task, watch the video beginning at 01:45.
-
Access the AI governance sample project in the Resource hub.
-
Click Create project.
-
If prompted to associate the project to a Cloud Object Storage instance, select a Cloud Object Storage instance from the list.
-
Click Create.
-
Wait for the project import to complete, and then click View new project to verify that the project and assets were created successfully.
-
Click the Assets tab to view the assets in the sample project.
Note: You might see a guided tour showing the tutorials that are included with this use case. The links in the guided tour will open these tutorial instructions.
 Check your progress
The following image shows the sample project. You are now ready to start the tutorial.

Task 1: Set up tracking for your model
 To preview this task, watch the video beginning at 02:35.
You track models by adding AI use cases to a catalog or inventory. With the IBM Knowledge Catalog Lite plan, you can create two catalogs. Follow these steps to see whether you already have a catalog and, if not, to create a catalog to store the AI use case. You need the appropriate roles and permissions assigned in order to create catalogs and AI use cases. Refer to User roles and permissions for IBM Knowledge Catalog and watsonx.ai Studio.
-
From the Navigation menu
, choose Catalogs > View all catalogs.
-
If you see a catalog on the Catalogs page, then you can skip to Task 2: Create the AI use case. Otherwise, follow these steps to create a new catalog:
-
Click New Catalog.
-
For the Name, copy and paste the catalog name exactly as shown with no leading or trailing spaces:
Mortgage Approval Catalog -
If prompted to associate the catalog to a Cloud Object Storage instance, select a Cloud Object Storage from the list.
-
Select Enforce data protection and data location rules, confirm the selection, and accept the defaults for the other fields.
-
Click Create.
-
 Check your progress
The following image shows your catalog. You are now ready to create the AI use case that is stored in the catalog.

Task 2: Create the AI use case
 To preview this task, watch the video beginning at 3:08.
For this type of project, it is best to create the AI use case when a project commences. An AI use case can reference multiple machine learning models that you can use to solve business problems. Then, data engineers and model evaluators can add models to the AI use case and track the model as it progresses through its lifecycle. Follow these steps to create the AI use case:
Tip: If this occasion is your first time accessing AI use cases, you see a guided tour asking if you want to set up model governance. For now, click Maybe later.
Task 2a: Create the use case
-
From the Navigation menu
, choose Catalogs > AI use cases.
-
Click New AI use case.
-
For the Name, copy and paste the name exactly as shown with no leading or trailing spaces:
Mortgage Approval Model Use Case -
For the Description, copy and paste the following text:
This model use case is for the Mortgage approval model at Golden Bank -
For the Inventory/Catalog field, select Mortgage Approval Catalog or a different existing catalog or inventory.
-
Click Create.
Task 2b: Associate the workspaces with the use case
You will use the sample project for the Develop phase. Before you can deploy the model, you need to promote the model to a deployment space in the Validate phase. Deployment spaces help you to organize supporting resources such as input data and environments; deploy models or functions to generate predictions or solutions; and view or edit deployment details.
Follow these steps to associate the workspaces with this use case:
-
Scroll to the Associated workspaces section.
-
Under the Develop phase, click Associate workspace.
-
Select the AI governance project.
-
Click Save.
-
-
Under the Validate phase, click Associate workspace.
-
Click New space.
-
For the deployment space name, copy and paste the name exactly as shown with no leading or trailing spaces:
-
For the Deployment stage, select Testing.
-
Select a storage service from the list.
-
Select your provisioned machine learning service from the list.
-
Click Create.
-
Click Close.
-
-
Select the Golden Bank Preproduction Space from the list.
-
Click Save.
-
 Check your progress
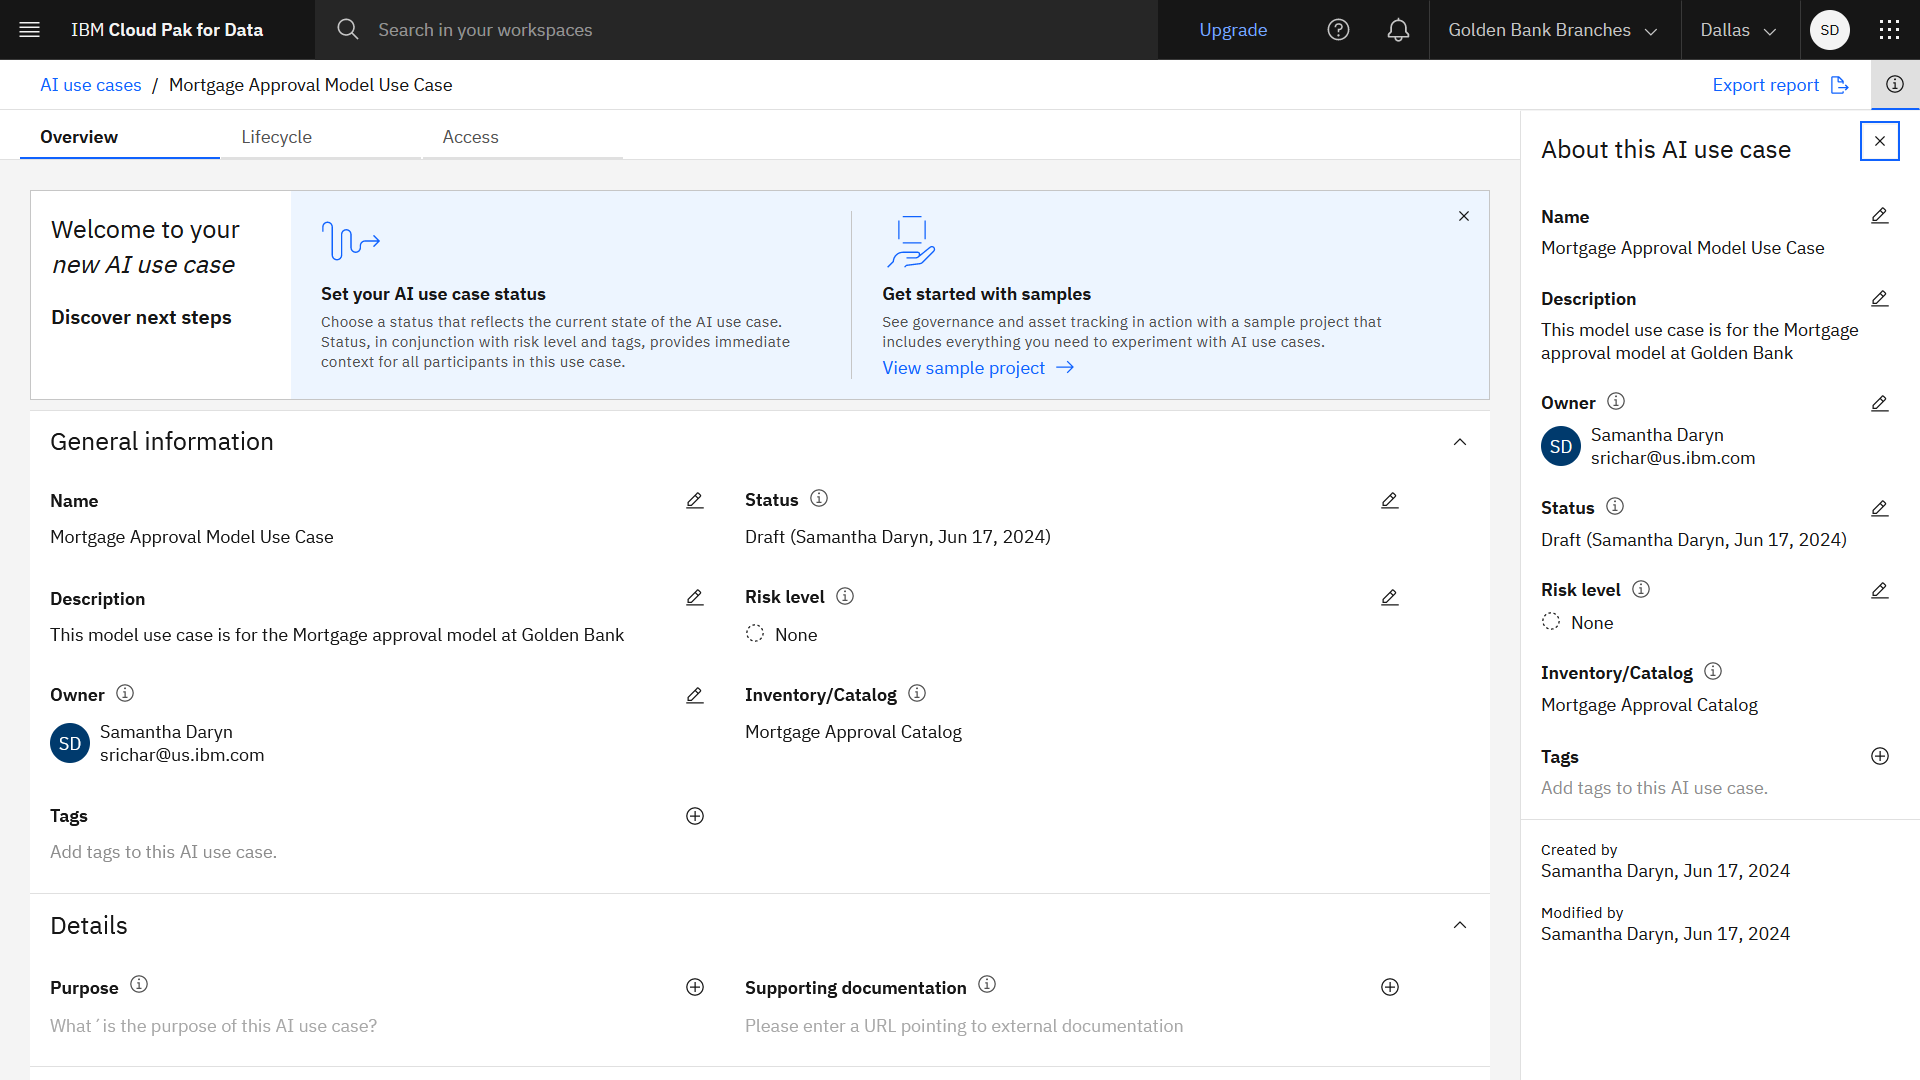
The following image shows your AI use case. The AI use case is now ready for data engineers and model evaluators to add models and track models as they progress through their lifecycle. The next task is to run the notebook to create the
model.
Task 3: Run the notebook to create the model
 To preview this task, watch the video beginning at 03:50.
Now you are ready to run the first notebook included in the sample project. The notebook includes the code to:
- Set up AI Factsheets used to track the lifecycle of the model.
- Load the training data, which is stored in the Db2 Warehouse connection in the sample project.
- Specify the target, categorical, and numerical columns along with the thresholds used to build the model.
- Build data pipelines.
- Build machine learning models.
- View the model results.
- Save the model.
Follow these steps to run the notebook included in the sample project. Take some time to read through the comments in the notebook, which explain the code in each cell.
-
From the Navigation menu
, choose Projects > View all projects.
-
Click the AI governance project name.
-
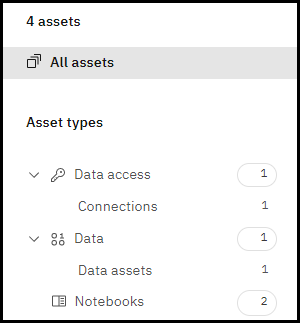
Click the Assets tab, and then navigate to Notebooks.
 Note:
Note:If you see if Caution icon
next to the notebook, then Click the Overflow menu
next to the 1-model-training-with-factsheets notebook, and choose Change environment. Select a supported Runtime on Python template, and click Change. You may also need to adjust the software specification and scikit-learn versions in the notebook.
-
Open the 1-model-training-with-factsheets notebook.
-
Since the notebook is in read-only mode, click the Edit icon
to place the notebook in edit mode.
-
When you import a project from the Resource hub, the first cell of the notebook contains the project access token. If this notebook does not contain a first cell with a project access token, you need to generate the token. At the top of the notebook, click the Insert a cell below icon
. From the More menu, select Insert project token. This action inserts a new cell as the first cell in the notebook containing the project token.
-
Under the Provide your IBM Cloud API key section, you need to pass your credentials to the watsonx.ai Runtime API using an API key. If you don't already have a saved API key, then follow these steps to create an API key.
 To preview this task, watch the video beginning at 04:44.
-
Access the IBM Cloud console API keys page.
-
Click Create an IBM Cloud API key. If you have any existing API keys, the button may be labelled Create.
-
Type a name and description.
-
Click Create.
-
Copy the API key.
-
Download the API key for future use.
-
Return to the notebook, and paste your API key in the ibmcloud_api_key field.
-
-
Click Cell > Run All to run all of the cells in the notebook. Alternatively, you can run the notebook cell by cell if you want to explore each cell and its output.
-
The notebook takes 1 - 3 minutes to complete. You can monitor the progress cell by cell, noticing the asterisk "In [
*1 -
If you encounter any errors during the notebook run, try these tips:
- Click Kernel > Restart & Clear Output to restart the kernel, and then run the notebook again.
- Verify that you created the AI use case by copying and pasting the specified artifact name exactly with no leading or trailing spaces.
 Check your progress
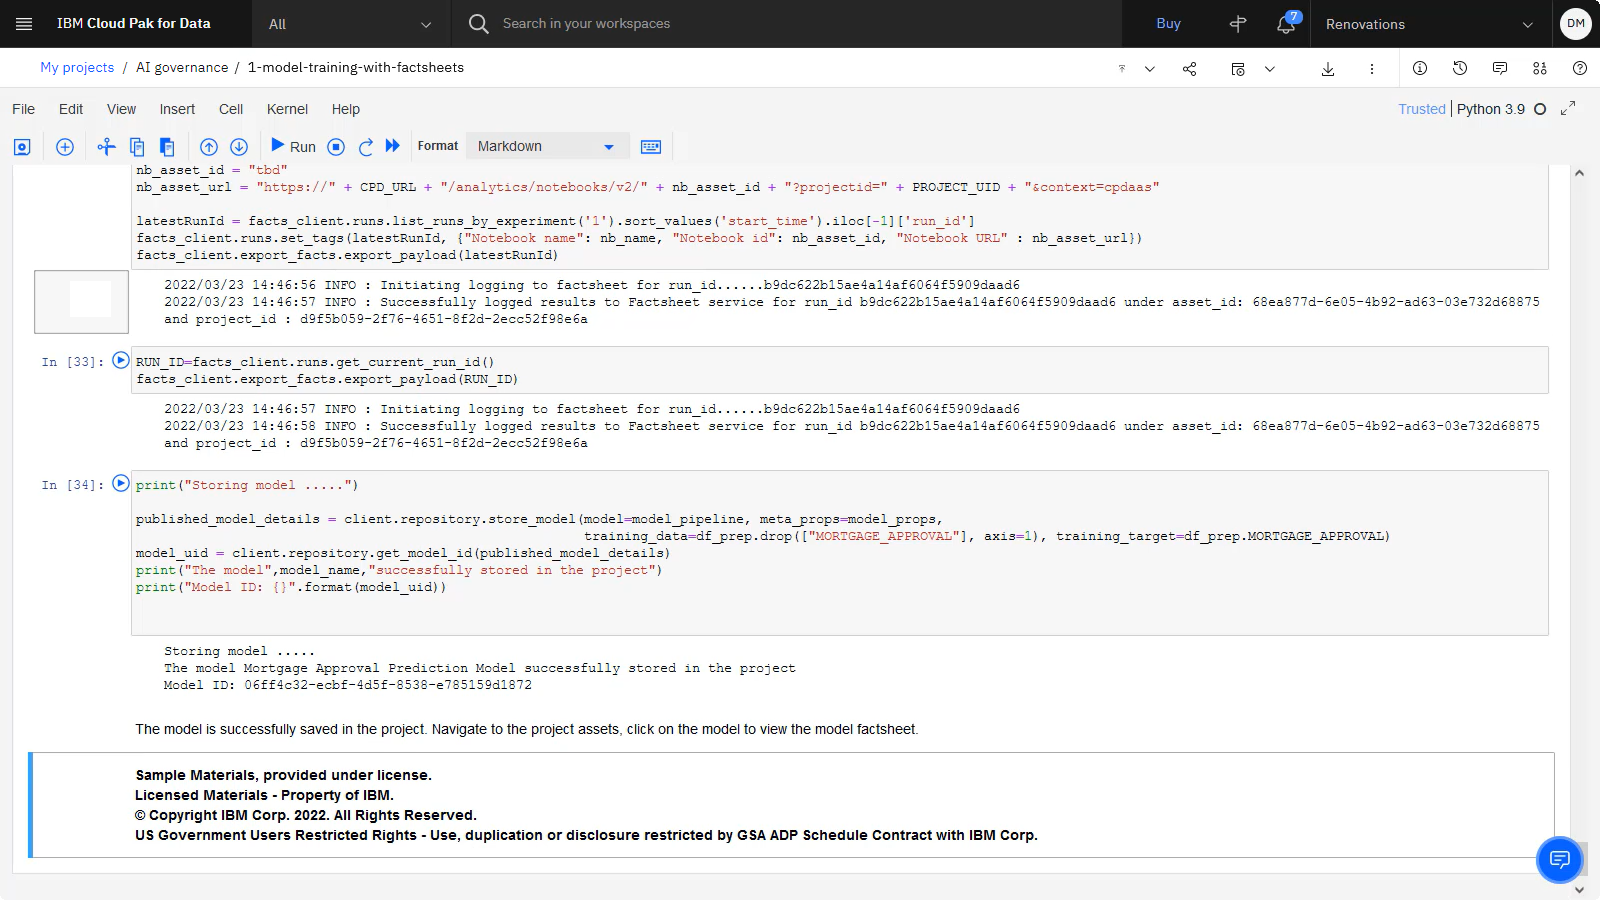
The following image shows the notebook when the run is complete. The notebook saved the model in the project, so you are now ready to view the model and start tracking it.
Task 4: View the model's factsheet and associate it with an AI use case
 To preview this task, watch the video beginning at 06:16.
After running all the cells in notebook, follow these steps to view the model's factsheet in the project and then associate that model with an AI use case:
-
Click the AI governance project name in the navigation trail.

-
Click the Assets tab, and then navigate to Models.
-
Click the Mortgage Approval Prediction Model asset name that you previously created to open the model.
-
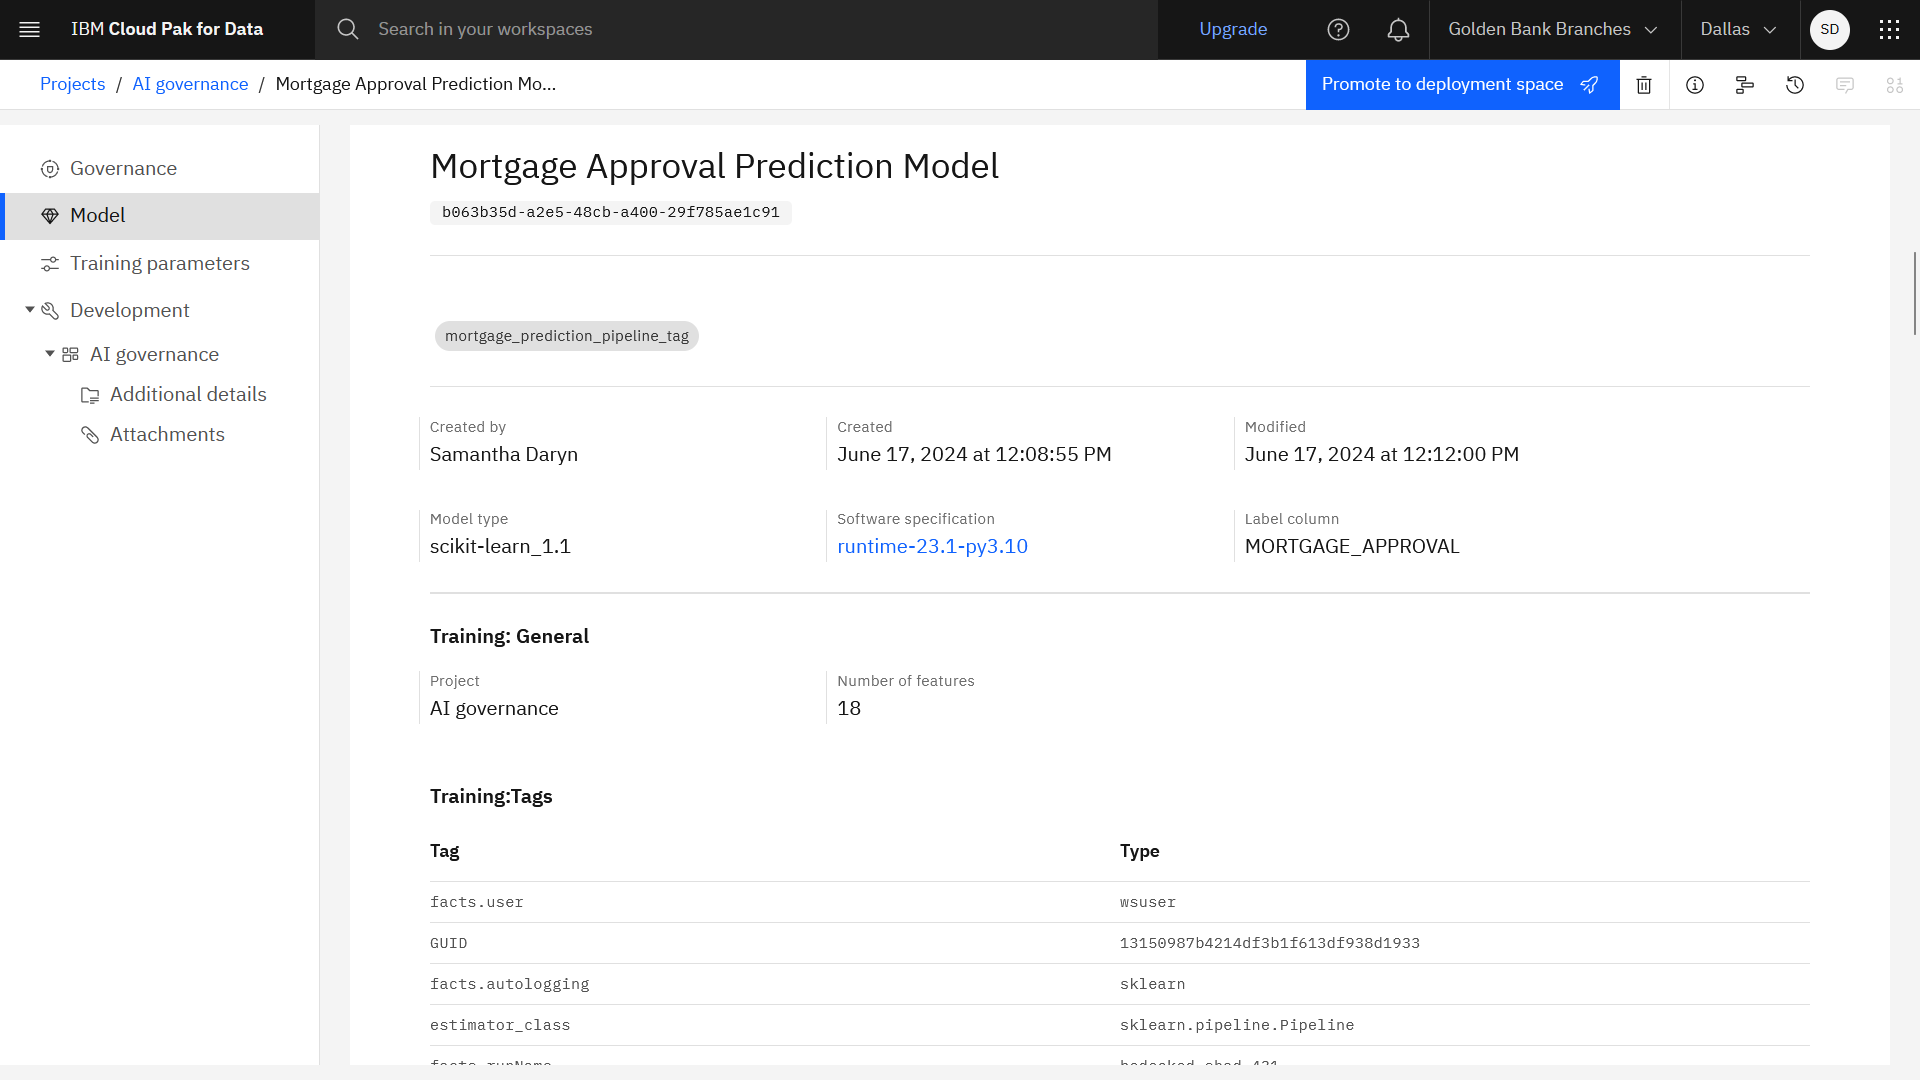
Review the AI Factsheet for your model. AI Factsheets capture model metadata across the model development lifecycle, facilitating subsequent enterprise validation or external regulation. AI Factsheets enables model validators and approvers to get an accurate, always up-to-date view of the model lifecycle details.
In the last task, you ran a notebook containing the AI Factsheets Python client code in the notebook that captured training metadata. Scroll to the Training metrics and Training tags sections to review the captured training metadata.The following image shows the AI Factsheet for the model:
-
Scroll up on the model page, and click Track in AI use case.
-
Notice that the associated AI use case is Mortgage Approval Model Use Case.
-
Select Default approach, and click Next.
-
Select Experimental, and click Track asset.
-
-
Back on the model page, click the View details icon
to open the AI use case.
-
On the AI use case page, click the Lifecycle tab.
-
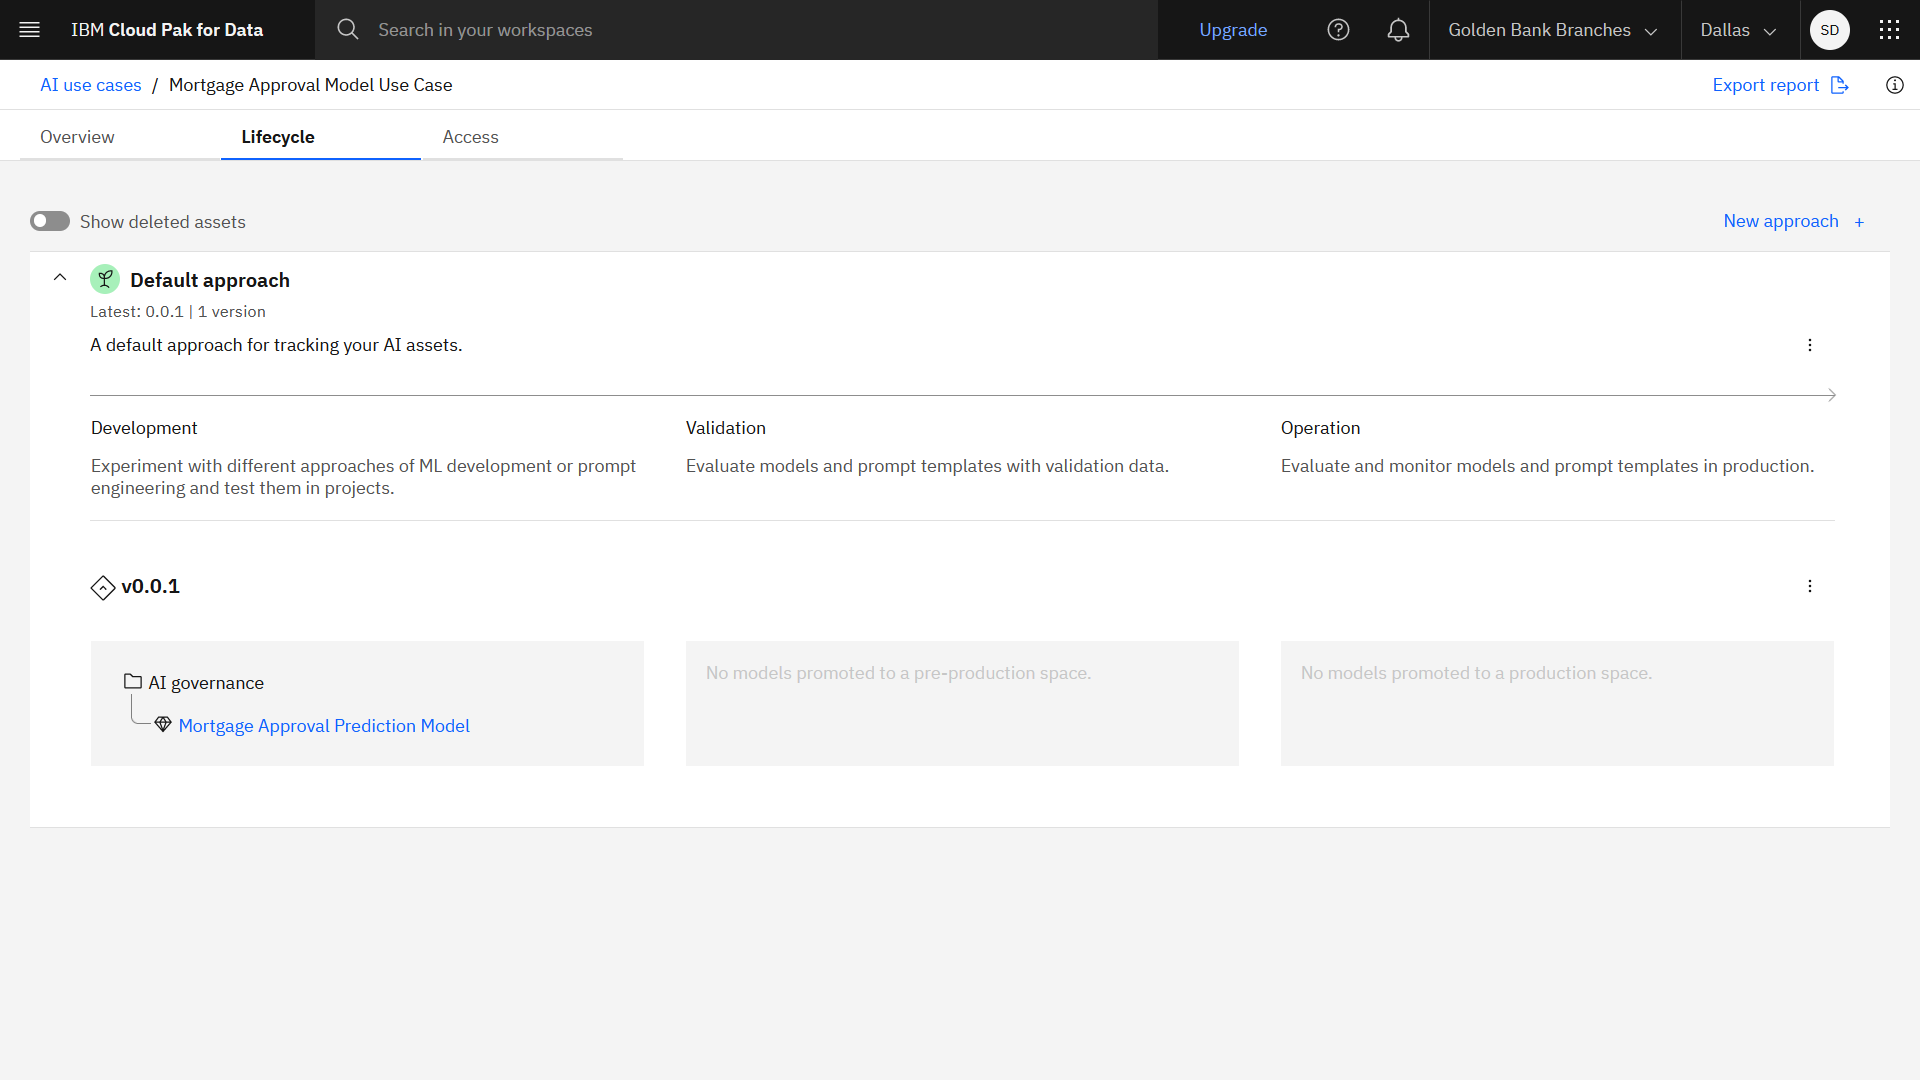
Under Default approach, you can see that AI Factsheets track models through their lifecycle. This model is still in the Development stage as it has not been deployed yet.
 Check your progress
The following image shows the AI use case with the model in the Develop phase. Now that you reviewed metadata such as the training data source, training metrics, and input schema that was captured in the AI Factsheet, you are ready to
deploy the model.
Task 5: Deploy the model
Before you can deploy the model, you need to promote the model to a deployment space. Deployment spaces help you to organize supporting resources such as input data and environments; deploy models or functions to generate predictions or solutions; and view or edit deployment details.
Task 5a: Promote the model to a deployment space
 To preview this task, watch the video beginning at 07:28.
Follow these steps to promote the model to a new deployment space:
-
From the AI use case, under the Development phase, click Mortgage Approval Prediction Model.
-
Click Open in project to open the model in the AI governance project.
-
On the model page, click Promote to deployment space
.
-
For the Target space, select Golden Bank Preproduction Space.
-
Check the Go to model in the space after promoting it option.
-
Click Promote.
 Check your progress
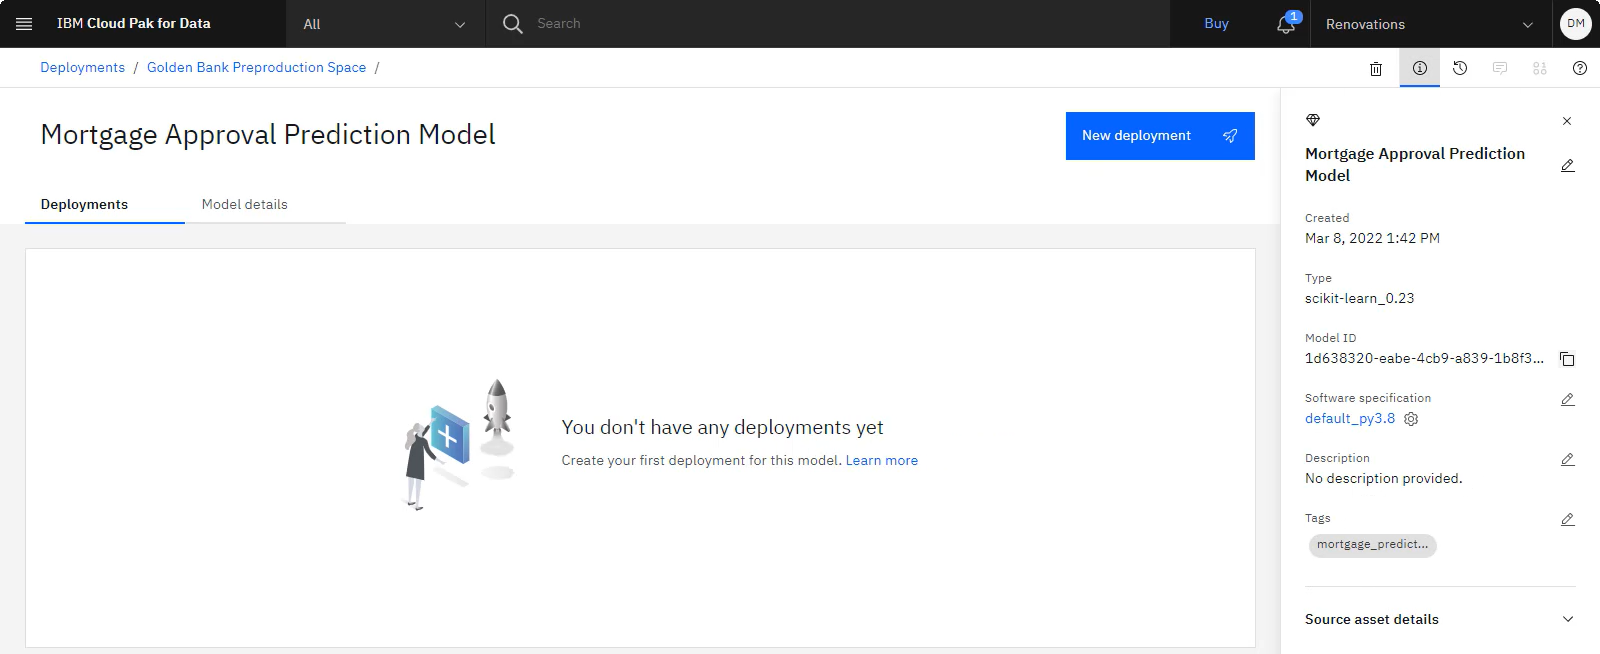
The following image shows the model in the deployment space. You are now ready to create a model deployment.
Task 5b: Create an online deployment for the model
 To preview this task, watch the video beginning at 08:33.
Follow these steps to create an online deployment for your model:
-
When the deployment space opens, click New deployment.
-
For the Deployment type, select Online.
-
For the Name, copy and paste the deployment name exactly as shown with no leading or trailing spaces:
Mortgage Approval Model Deployment -
Click Create.
-
-
The model deployment may take several minutes to complete. When the model is deployed successfully, return to the use case; From the Navigation Menu
, choose Catalogs > AI use cases.
-
Open the Mortgage Approval Model Use Case.
-
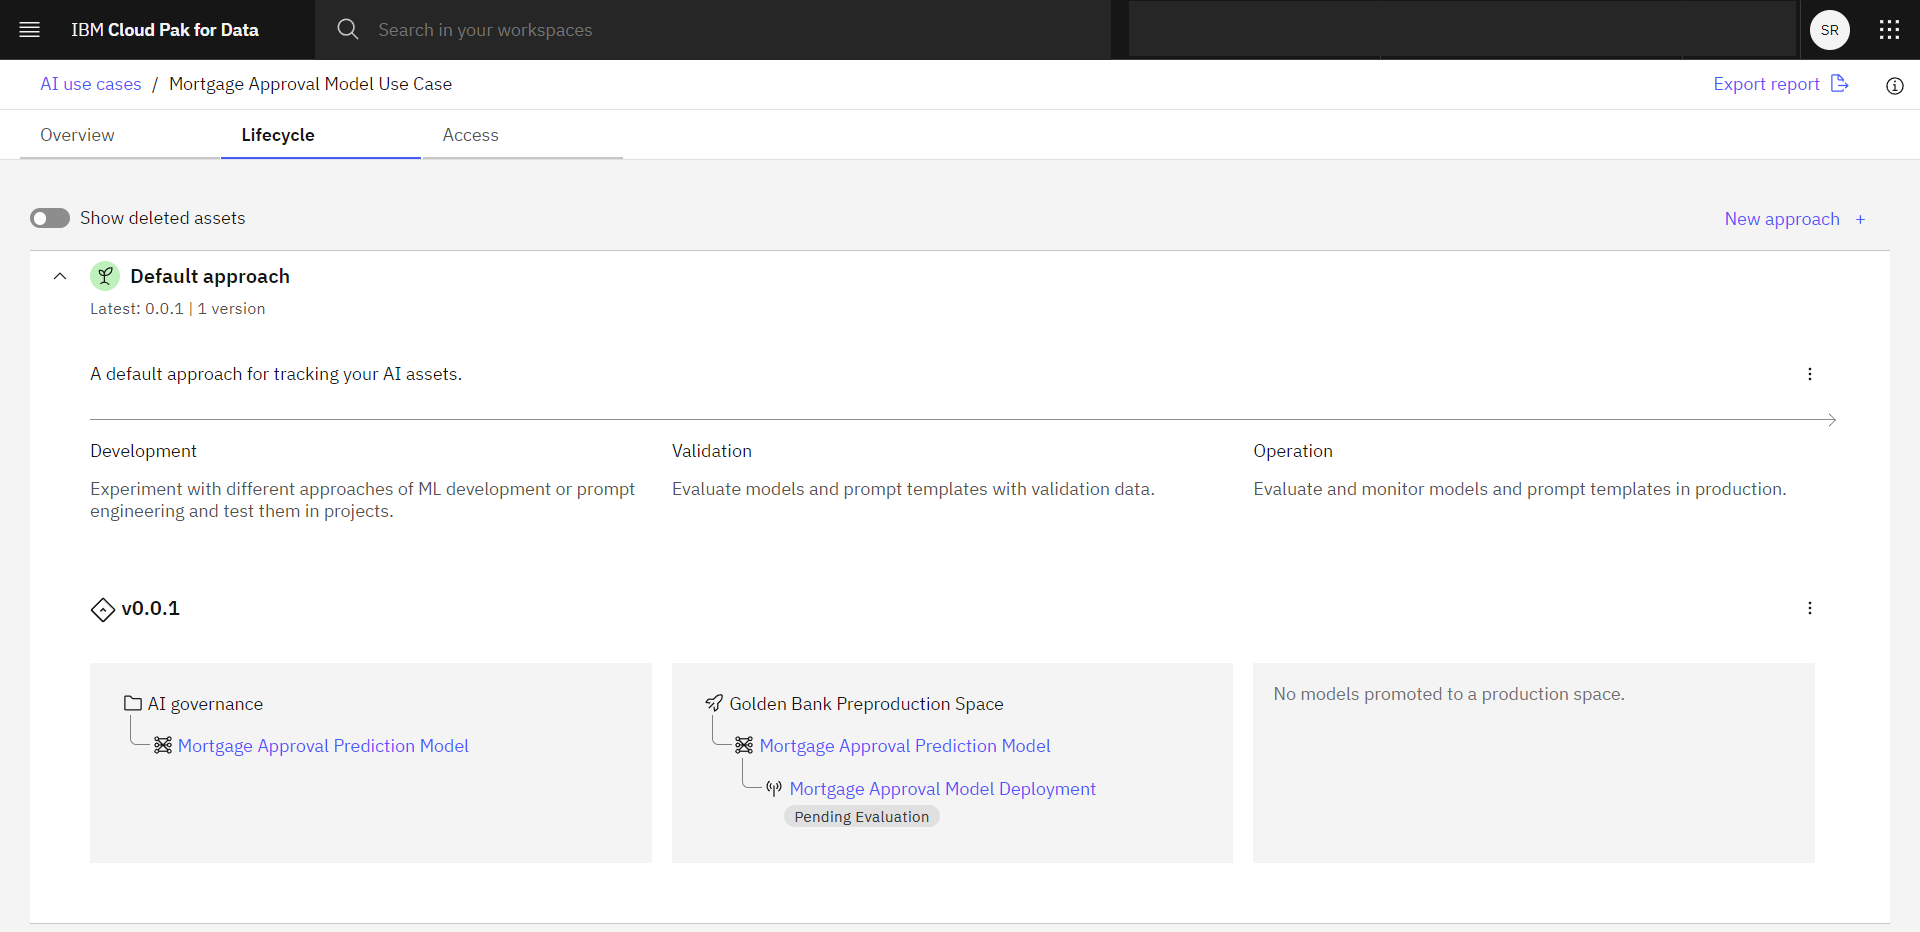
Click the Lifecycle tab. Under Default approach, you can see that the Validation stage now shows the model deployment in addition to the model.
 Check your progress
The following image shows the AI use case with the model in the Deployment phase. Your model is now ready for you to evaluate in Watson OpenScale.
As a data scientist at Golden Bank, you created a mortgage approval model by running a Jupyter Notebook that built the model and automatically captured metadata to track the model in an AI Factsheet. You then promoted the model to a deployment space, and deployed the model.
Next steps
You are now ready to validate and monitor your deployed machine learning model to ensure it is working accurately and fairly. For this task, you will use Watson OpenScale. See the Test and validate the model tutorial.
Learn more
Parent topic: Use case tutorials
Was the topic helpful?
0/1000
