You can create, train, and deploy machine learning models with watsonx.ai Runtime in a Jupyter notebook. Read about the Jupyter notebooks, then watch a video and take a tutorial that’s suitable for intermediate users and requires coding.
- Required services
- watsonx.ai Studio
- watsonx.ai Runtime
Your basic workflow includes these tasks:
- Create a project. Projects are where you can collaborate with others to work with data.
- Add a notebook to the project. You can create a blank notebook or import a notebook from a file or GitHub repository.
- Add code and run the notebook.
- Review the model pipelines and save the desired pipeline as a model.
- Deploy and test your model.
Read about Jupyter notebooks
A Jupyter notebook is a web-based environment for interactive computing. If you choose to build a machine learning model in a notebook, you should be comfortable with coding in a Jupyter notebook. You can run small pieces of code that process your data, and then immediately view the results of your computation. Using this tool, you can assemble, test, and run all of the building blocks you need to work with data, save the data to watsonx.ai Runtime, and deploy the model.
Watch a video about creating a model in a Jupyter notebook
 Watch this video to see how to train, deploy, and test a machine learning model in a Jupyter notebook.
This video provides a visual method to learn the concepts and tasks in this documentation.
Try a tutorial to create a model in a Jupyter notebook
In this tutorial, you will complete these tasks:
-
- Build and train a model.
- Save a pipeline as a model.
- Deploy the model.
- Test the deployed model.
-
Task 5: View and test the deployed model in the deployment space.
This tutorial will take approximately 30 minutes to complete.
Sample data
The sample data used in this tutorial is from data that is part of scikit-learn and will be used to train a model to recognize images of hand-written digits, from 0-9.
Tips for completing this tutorial
Here are some tips for successfully completing this tutorial.
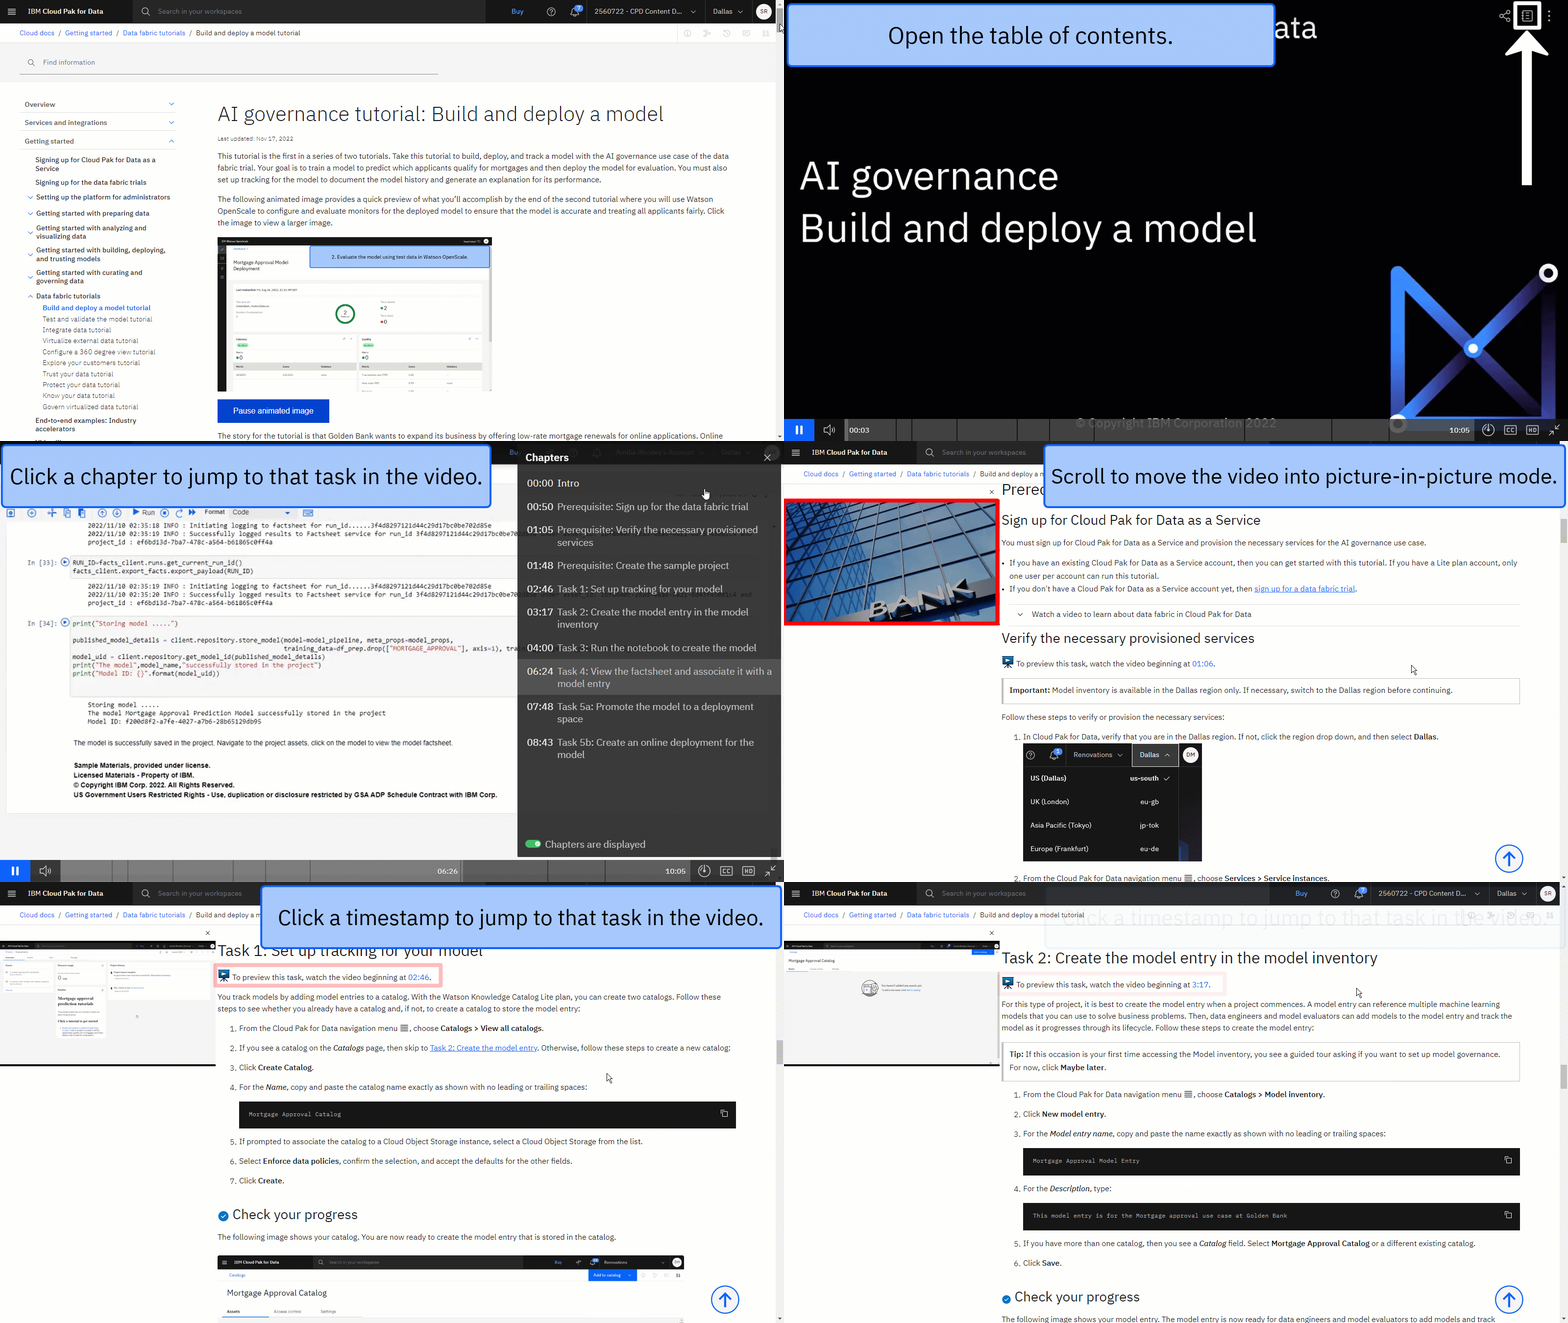
Use the video picture-in-picture
The following animated image shows how to use the video picture-in-picture and table of contents features:
Get help in the community
If you need help with this tutorial, you can ask a question or find an answer in the Cloud Pak for Data Community discussion forum.
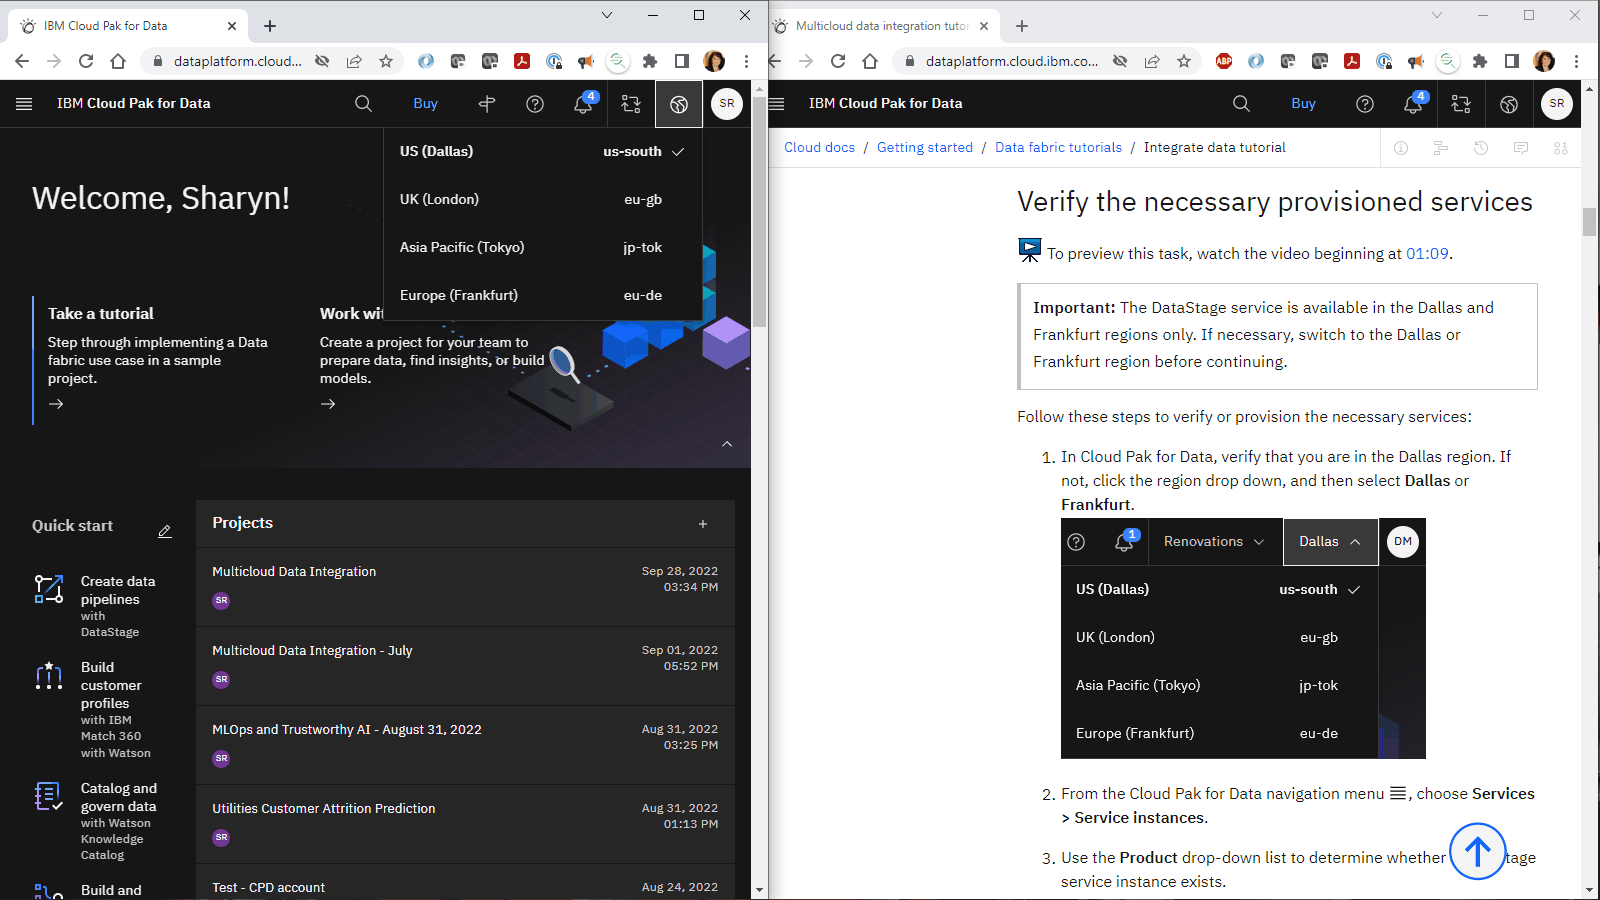
Set up your browser windows
For the optimal experience completing this tutorial, open Cloud Pak for Data in one browser window, and keep this tutorial page open in another browser window to switch easily between the two applications. Consider arranging the two browser windows side-by-side to make it easier to follow along.
Task 1: Open a project
You need a project to store the data and the AutoAI experiment. You can use an existing project or create a project.
-
From the Navigation Menu
, choose Projects > View all projects
-
Open an existing project. If you want to use a new project:
-
Click New project.
-
Select Create an empty project.
-
Enter a name and optional description for the project.
-
Choose an existing object storage service instance or create a new one.
-
Click Create.
-
-
When the project opens, click the Manage tab and select the Services and integrations page.
 To preview this task, watch the video beginning at 00:07.
-
On the IBM services tab, click Associate service.
-
Select your watsonx.ai Runtime instance. If you don't have a watsonx.ai Runtime service instance provisioned yet, follow these steps:
-
Click New service.
-
Select watsonx.ai Runtime.
-
Click Create.
-
Select the new service instance from the list.
-
-
Click Associate service.
-
If necessary, click Cancel to return to the Services & Integrations page.
-
For more information or to watch a video, see Creating a project.
For more information on associated services, see Adding associated services.
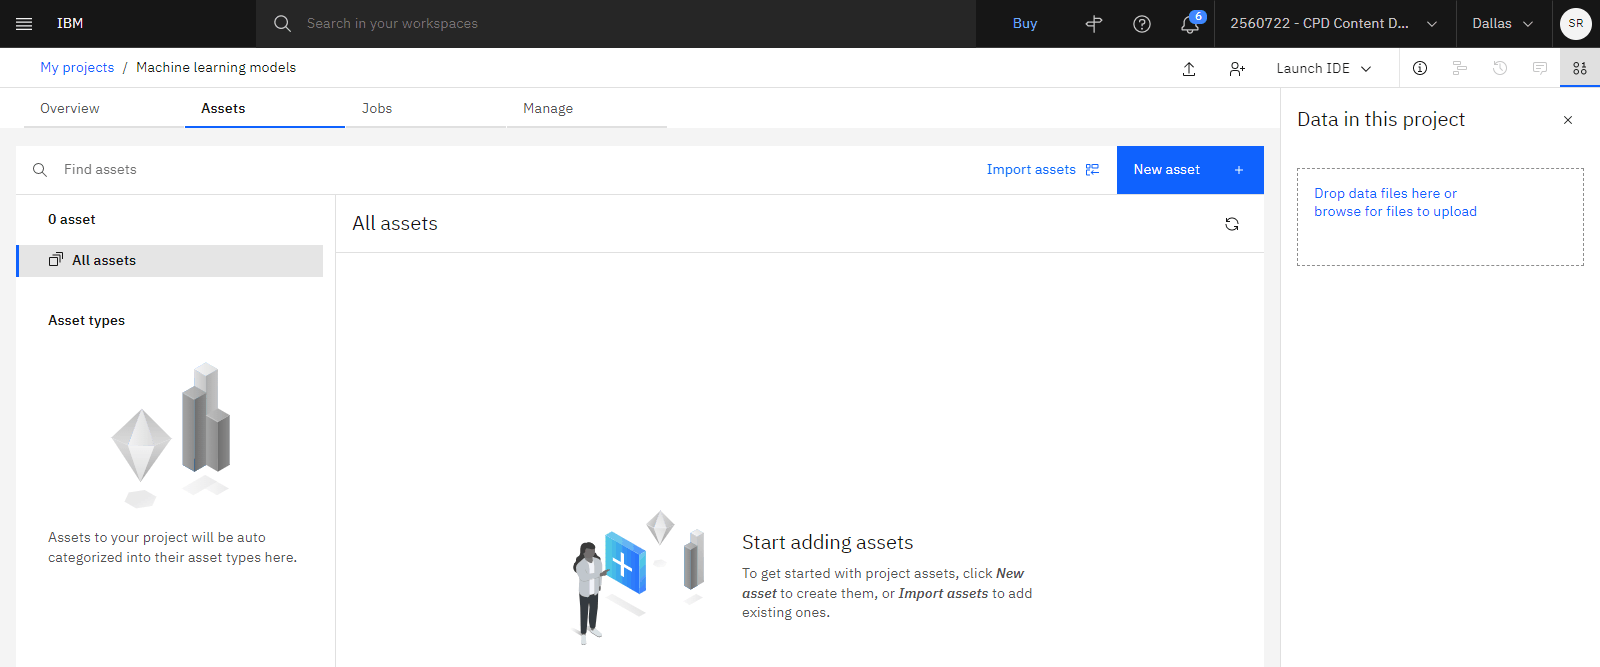
 Check your progress
The following image shows the new project.
Task 2: Add a notebook to your project
 To preview this task, watch the video beginning at 00:18.
You will use a sample notebook in this tutorial. Follow these steps to add the sample notebook to your project:
-
Access the Use sckit-learn to recognize hand-written digits notebook in the Resource hub.
-
Click Add to project.
-
Select the project from the list, and click Add.
-
Verify the notebook name and description (optional).
-
Select a runtime environment for this notebook.
-
Click Create. Wait for the notebook editor to load.
-
From the menu, click Kernel > Restart & Clear Output, then confirm by clicking Restart and Clear All Outputs to clear the output from the last saved run.
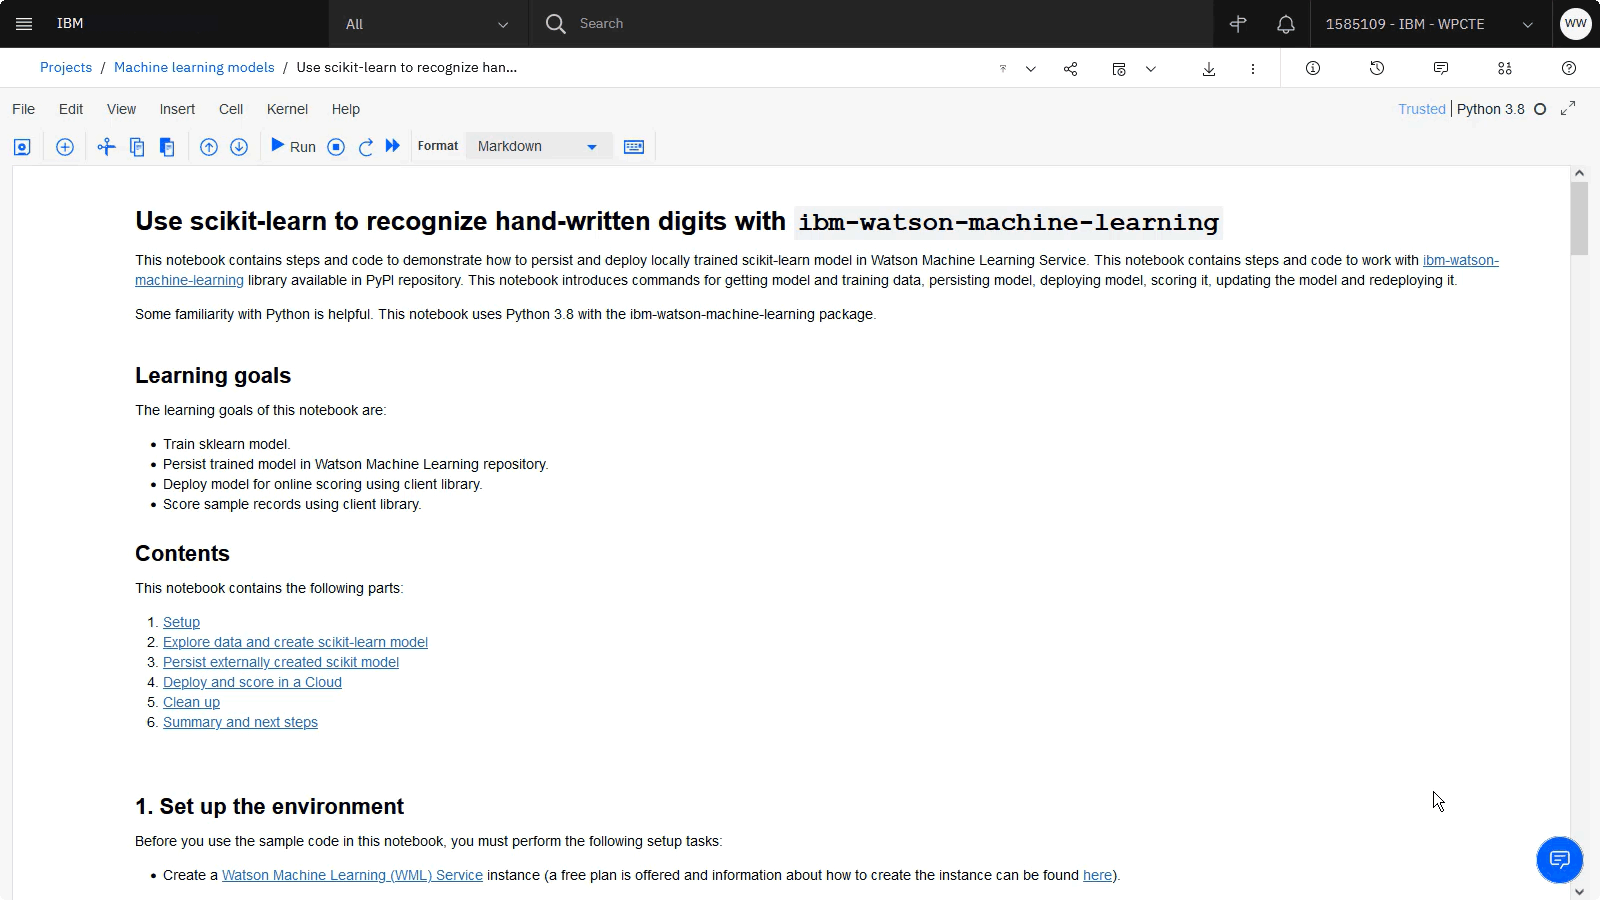
 Check your progress
The following image shows the new notebook.
Task 3: Set up the environment
 To preview this task, watch the video beginning at 00:44.
The first section in the notebook sets up the environment by specifying your IBM Cloud credentials and watsonx.ai Runtime service instance location. Follow these steps to set up the environment in your notebook:
-
Scroll to the Set up the environment section.
-
Choose a method to obtain the API key and location.
-
Run the IBM Cloud CLI commands in the notebook from a command prompt.
-
Use the IBM Cloud console.
-
Launch the API keys section in the IBM Cloud Console, and create an API key.
-
Access your IBM Cloud resource list, view your watsonx.ai Runtime service instance, and note the Location.
-
See the watsonx.ai Runtime API Docs for the correct endpoint URL. For example, Dallas is in us-south.
-
-
-
Paste your API key and location into cell 1.
-
Click the Run icon
to run your code in cells 1 and 2.
-
Run cell 3 to install the
ibm-watson-machine-learningpackage. -
Run cell 4 to import the API client and create the API client instance using your credentials.
-
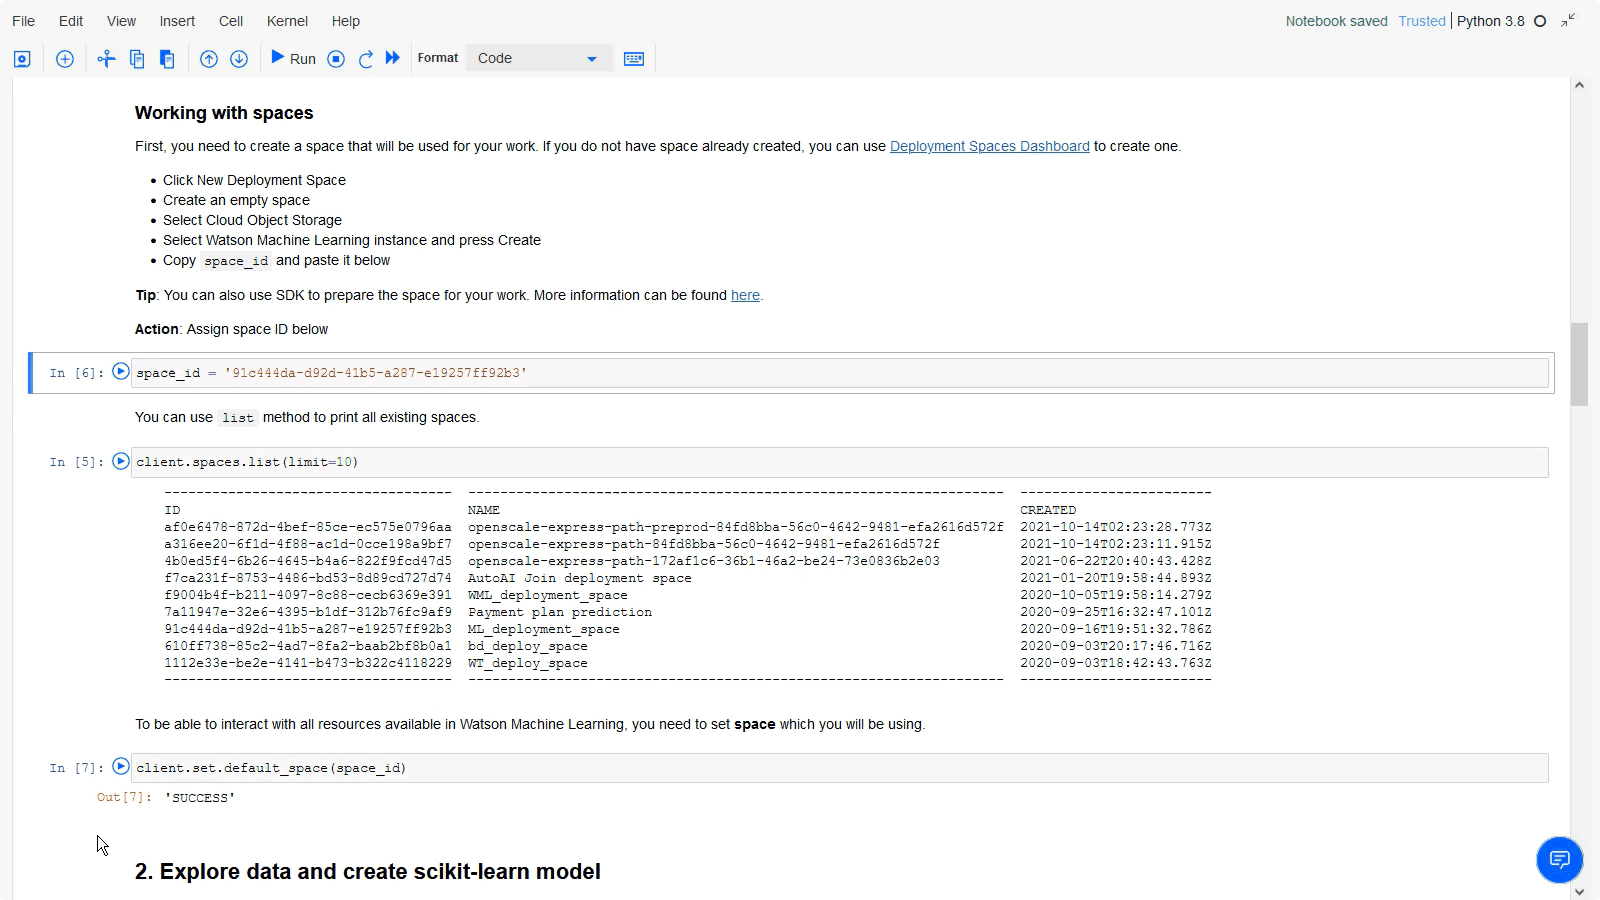
Run the cell with the code
client.spaces.list(limit=10)to see a list of all existing deployment spaces. If you do not have a deployment space, then follow these steps:-
Open another tab with your Cloud Pak for Data deployment.
-
From the Navigation Menu
, click Deployments.
-
Click New deployment space.
-
Add a name and optional description for the deployment.
-
Click Create, then View new space.
-
Click the Manage tab.
-
Copy the Space GUID and close the tab, this value will be your
space_id.
-
-
Copy and paste the appropriate deployment space ID into the cell with the code
space_id = 'PASTE YOUR SPACE ID HERE', then run that cell and the cell with the codeclient.set.default_space(space_id)to set the default space.
 Check your progress
The following image shows the notebook with all of the environment variables set up.
Task 4: Run the notebook
 To preview this task, watch the video beginning at 02:14.
Now that all of the environment variables are set up, you can run the rest of the cells in the notebook. Follow these steps to read through the comments, run the cells, and review the output:
-
Run the cells in the Explore data section.
-
Run the cells in the Create a scikit-learn model section to.
-
Prepare the data by splitting it into three data sets (train, test, and score).
-
Create the pipeline.
-
Train the model.
-
Evaluate the model using the test data.
-
-
Run the cells in the Persist locally created scikit-learn model section to publish the model, get model details, and get all models.
Note:If you are using Runtime 24.1 on Python 3.11, then you will need to change the
software_spec_uidtoruntime-24.1-py3.11and the scikit-learn version toscikit-learn-1.3. -
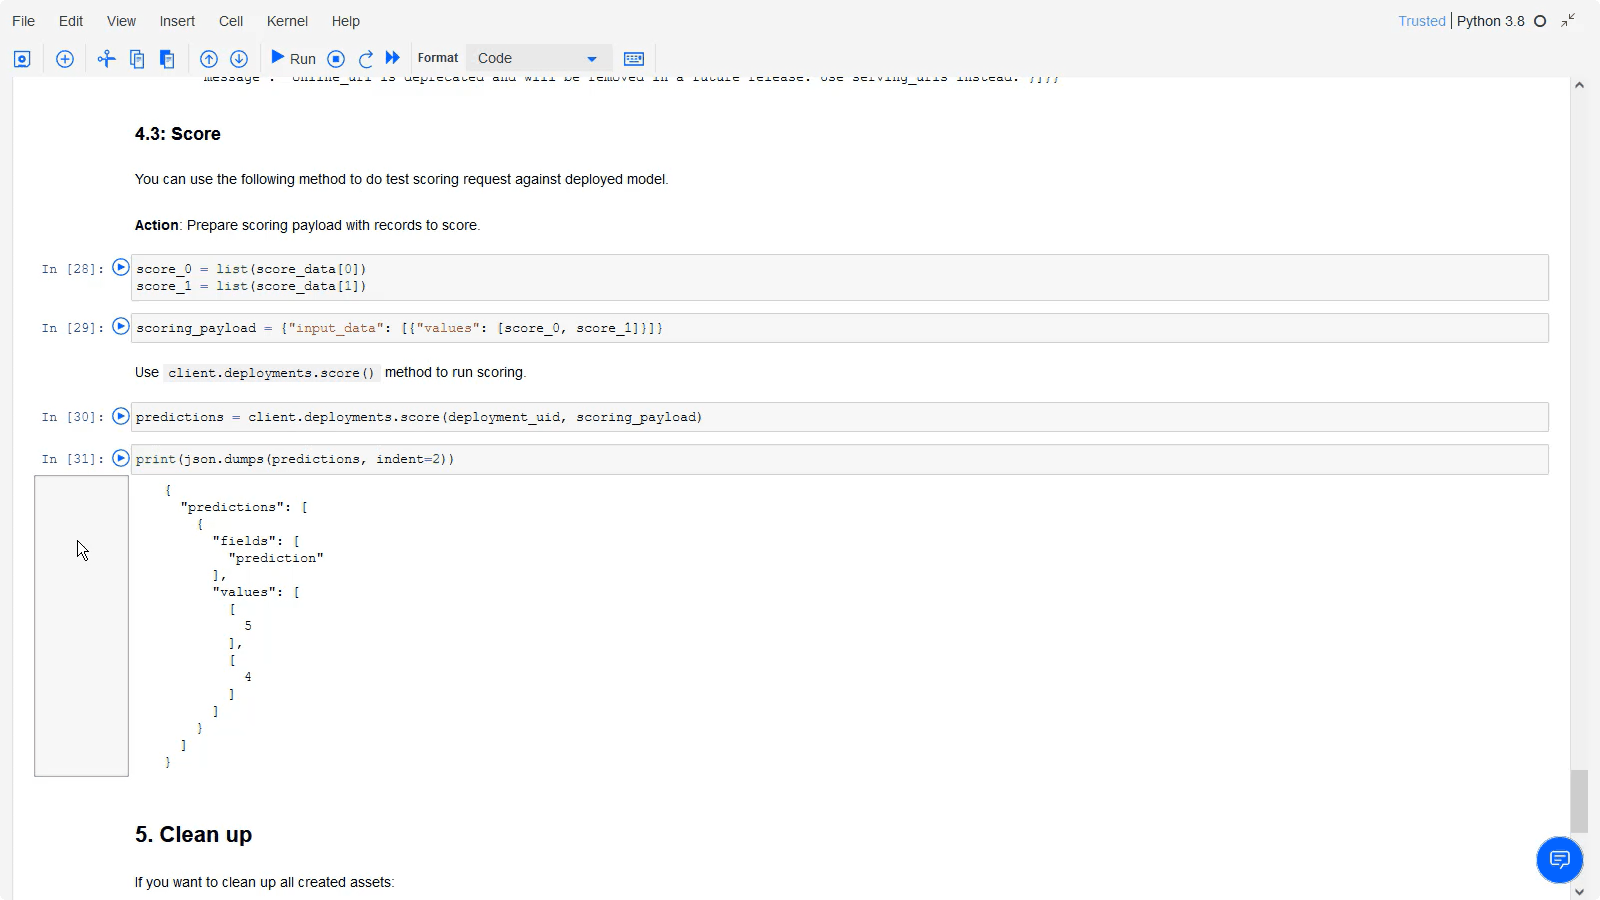
Run the cells in the Deploy and score section to create the online deployment, get deployment details, and send a scoring request to the deployed model to see the prediction.
-
Click File > Save.
 Check your progress
The following image shows the notebook with the prediction.
Task 5: View and test the deployed model in the deployment space
 To preview this task, watch the video beginning at 04:07.
You can also view the model deployment directly from the deployment space. Follow these steps to test the deployed model in the space.
-
From the Navigation Menu
, click Deployments.
-
Click the Spaces tab.
-
Select the appropriate deployment space from the list.
-
Click Scikit model.
-
Click Deployment of scikit model.
-
Review the Endpoint and Code snippets.
-
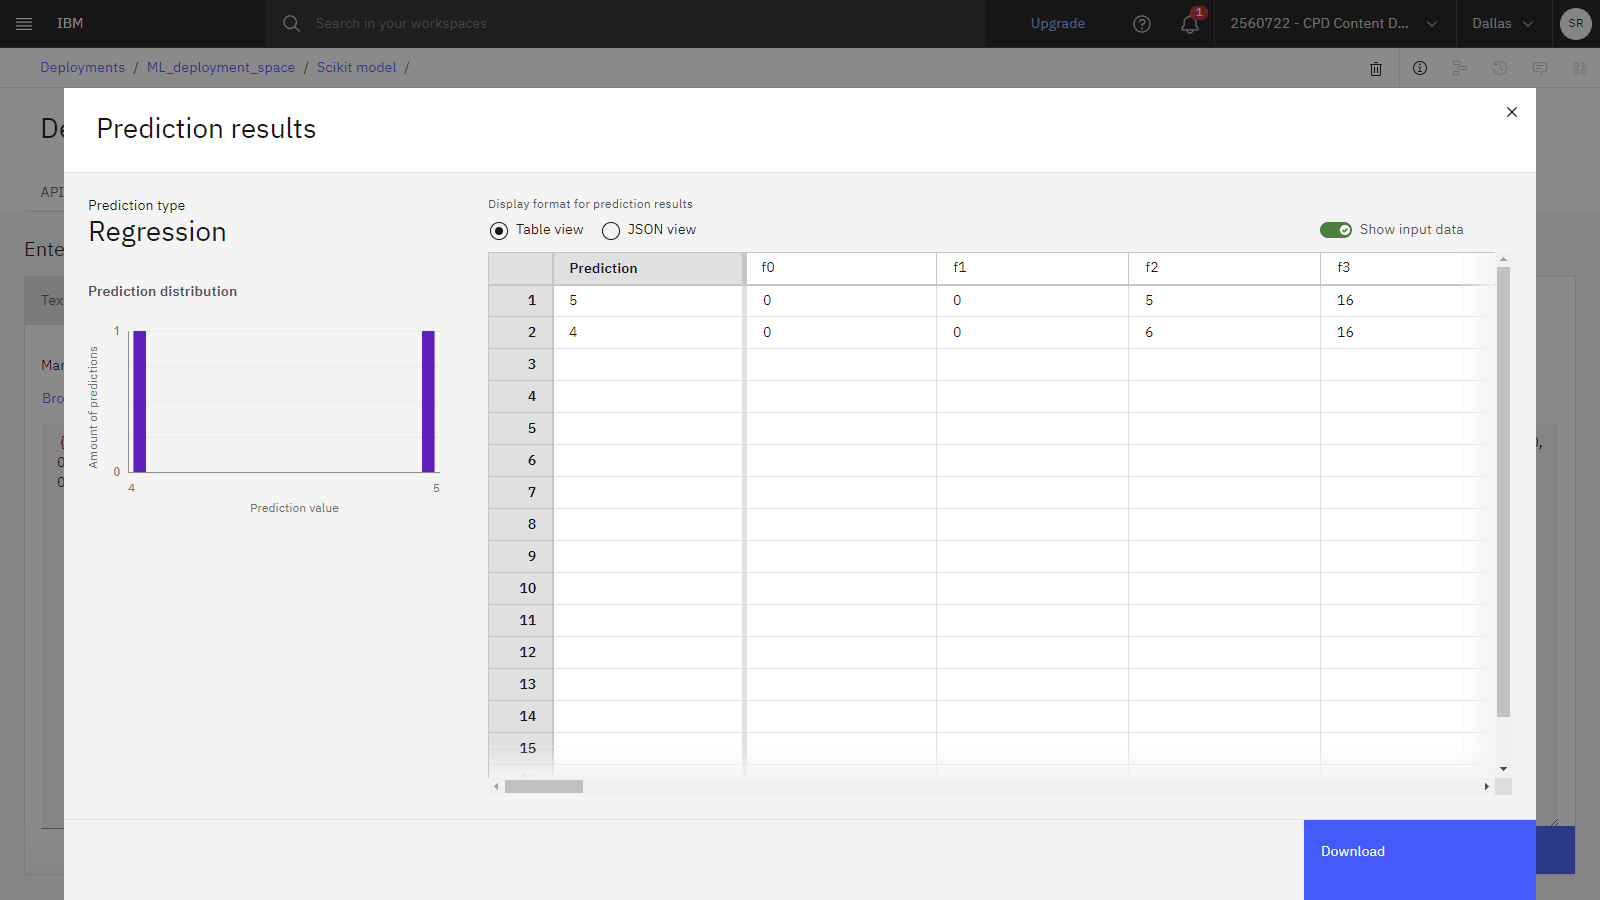
Click the Test tab. You can test the deployed model by pasting the following JSON code:
{"input_data": [{"values": [[0.0, 0.0, 5.0, 16.0, 16.0, 3.0, 0.0, 0.0, 0.0, 0.0, 9.0, 16.0, 7.0, 0.0, 0.0, 0.0, 0.0, 0.0, 12.0, 15.0, 2.0, 0.0, 0.0, 0.0, 0.0, 1.0, 15.0, 16.0, 15.0, 4.0, 0.0, 0.0, 0.0, 0.0, 9.0, 13.0, 16.0, 9.0, 0.0, 0.0, 0.0, 0.0, 0.0, 0.0, 14.0, 12.0, 0.0, 0.0, 0.0, 0.0, 5.0, 12.0, 16.0, 8.0, 0.0, 0.0, 0.0, 0.0, 3.0, 15.0, 15.0, 1.0, 0.0, 0.0], [0.0, 0.0, 6.0, 16.0, 12.0, 1.0, 0.0, 0.0, 0.0, 0.0, 5.0, 16.0, 13.0, 10.0, 0.0, 0.0, 0.0, 0.0, 0.0, 5.0, 5.0, 15.0, 0.0, 0.0, 0.0, 0.0, 0.0, 0.0, 8.0, 15.0, 0.0, 0.0, 0.0, 0.0, 0.0, 0.0, 13.0, 13.0, 0.0, 0.0, 0.0, 0.0, 0.0, 6.0, 16.0, 9.0, 4.0, 1.0, 0.0, 0.0, 3.0, 16.0, 16.0, 16.0, 16.0, 10.0, 0.0, 0.0, 5.0, 16.0, 11.0, 9.0, 6.0, 2.0]]}]} -
Click Predict. The resulting prediction indicates that the hand-written digits are 5 and 4.
 Check your progress
The following image shows the Test tab with the prediction.
(Optional) Task 6: Clean up
If you'd like to remove all of the assets created by the notebook, create a new notebook based on the Machine Learning artifacts management notebook. A link to this notebook is also available in the Clean up section of the Use scikit-learn to recognize hand-written digits notebook used in this tutorial.
Next steps
Now you can use this data set for further analysis. For example, you or other users can do any of these tasks:
Additional resources
-
Try these other methods to build models:
-
View more videos
-
Find sample data sets and notebooks to gain hands-on experience building models in the Resource hub
-
Find more Python client samples and examples.
Parent topic: Quick start tutorials